oakmachine / projects / Vera Gate
2024-02-11
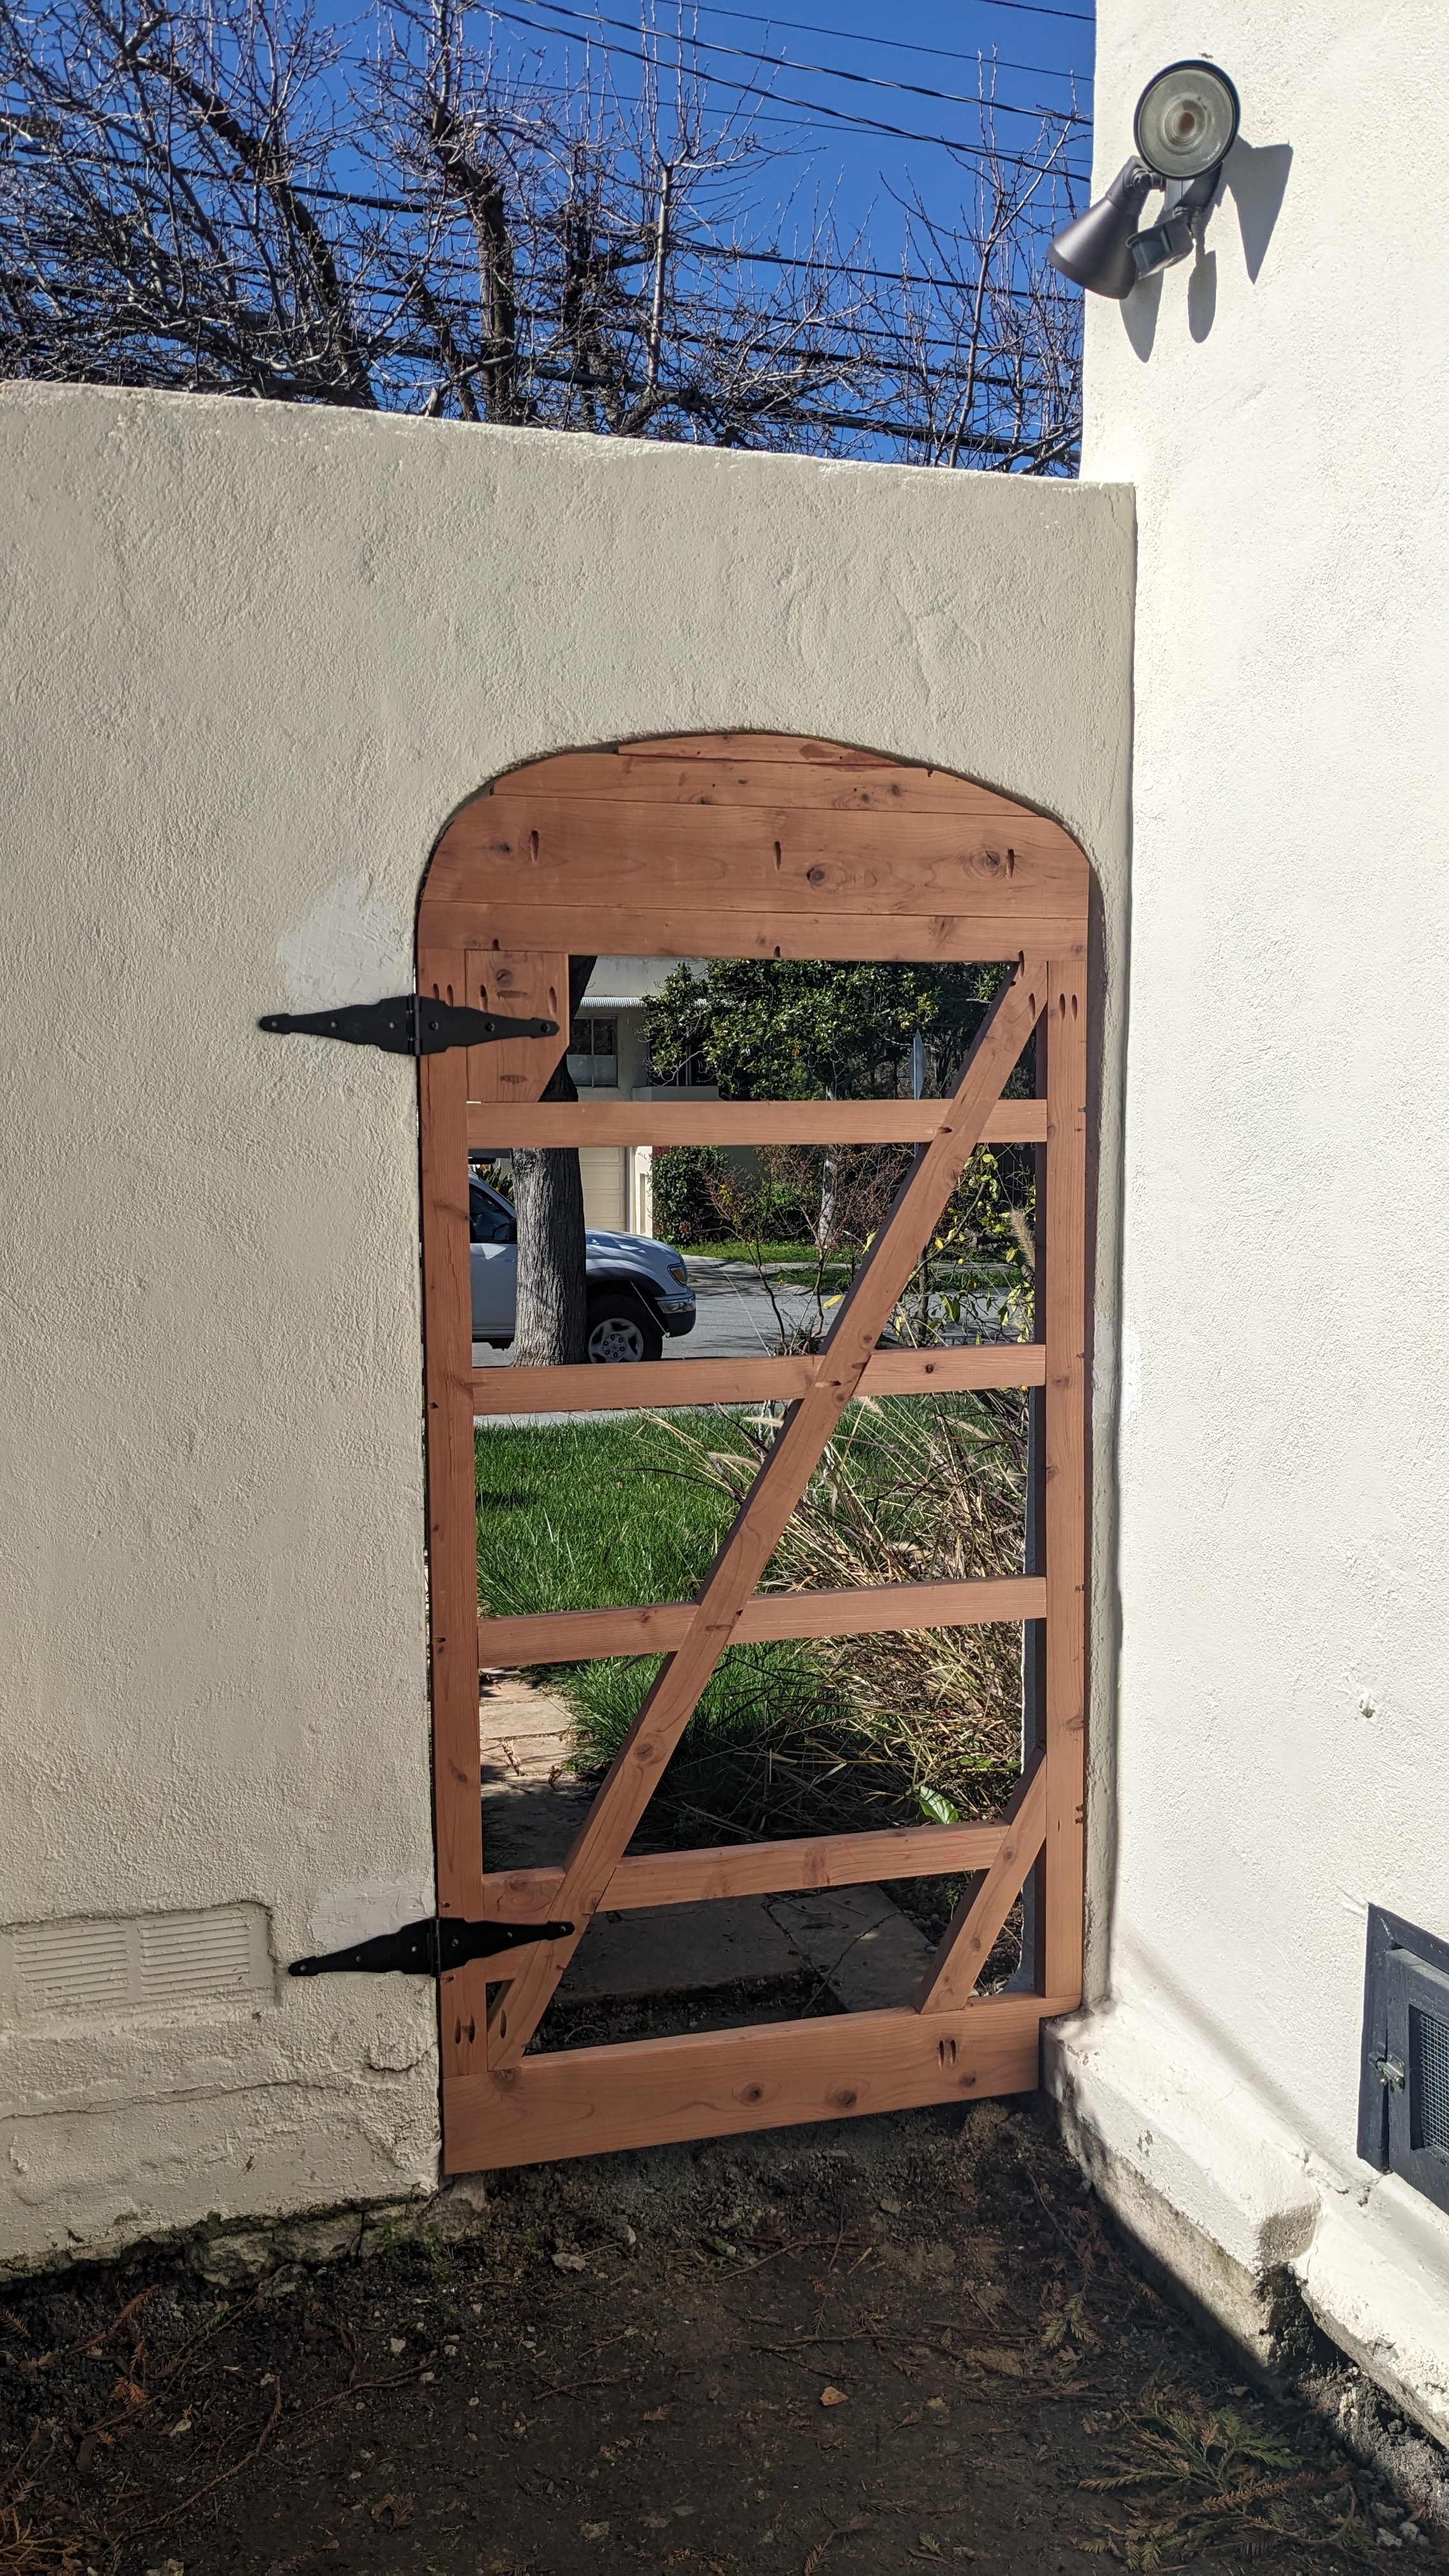
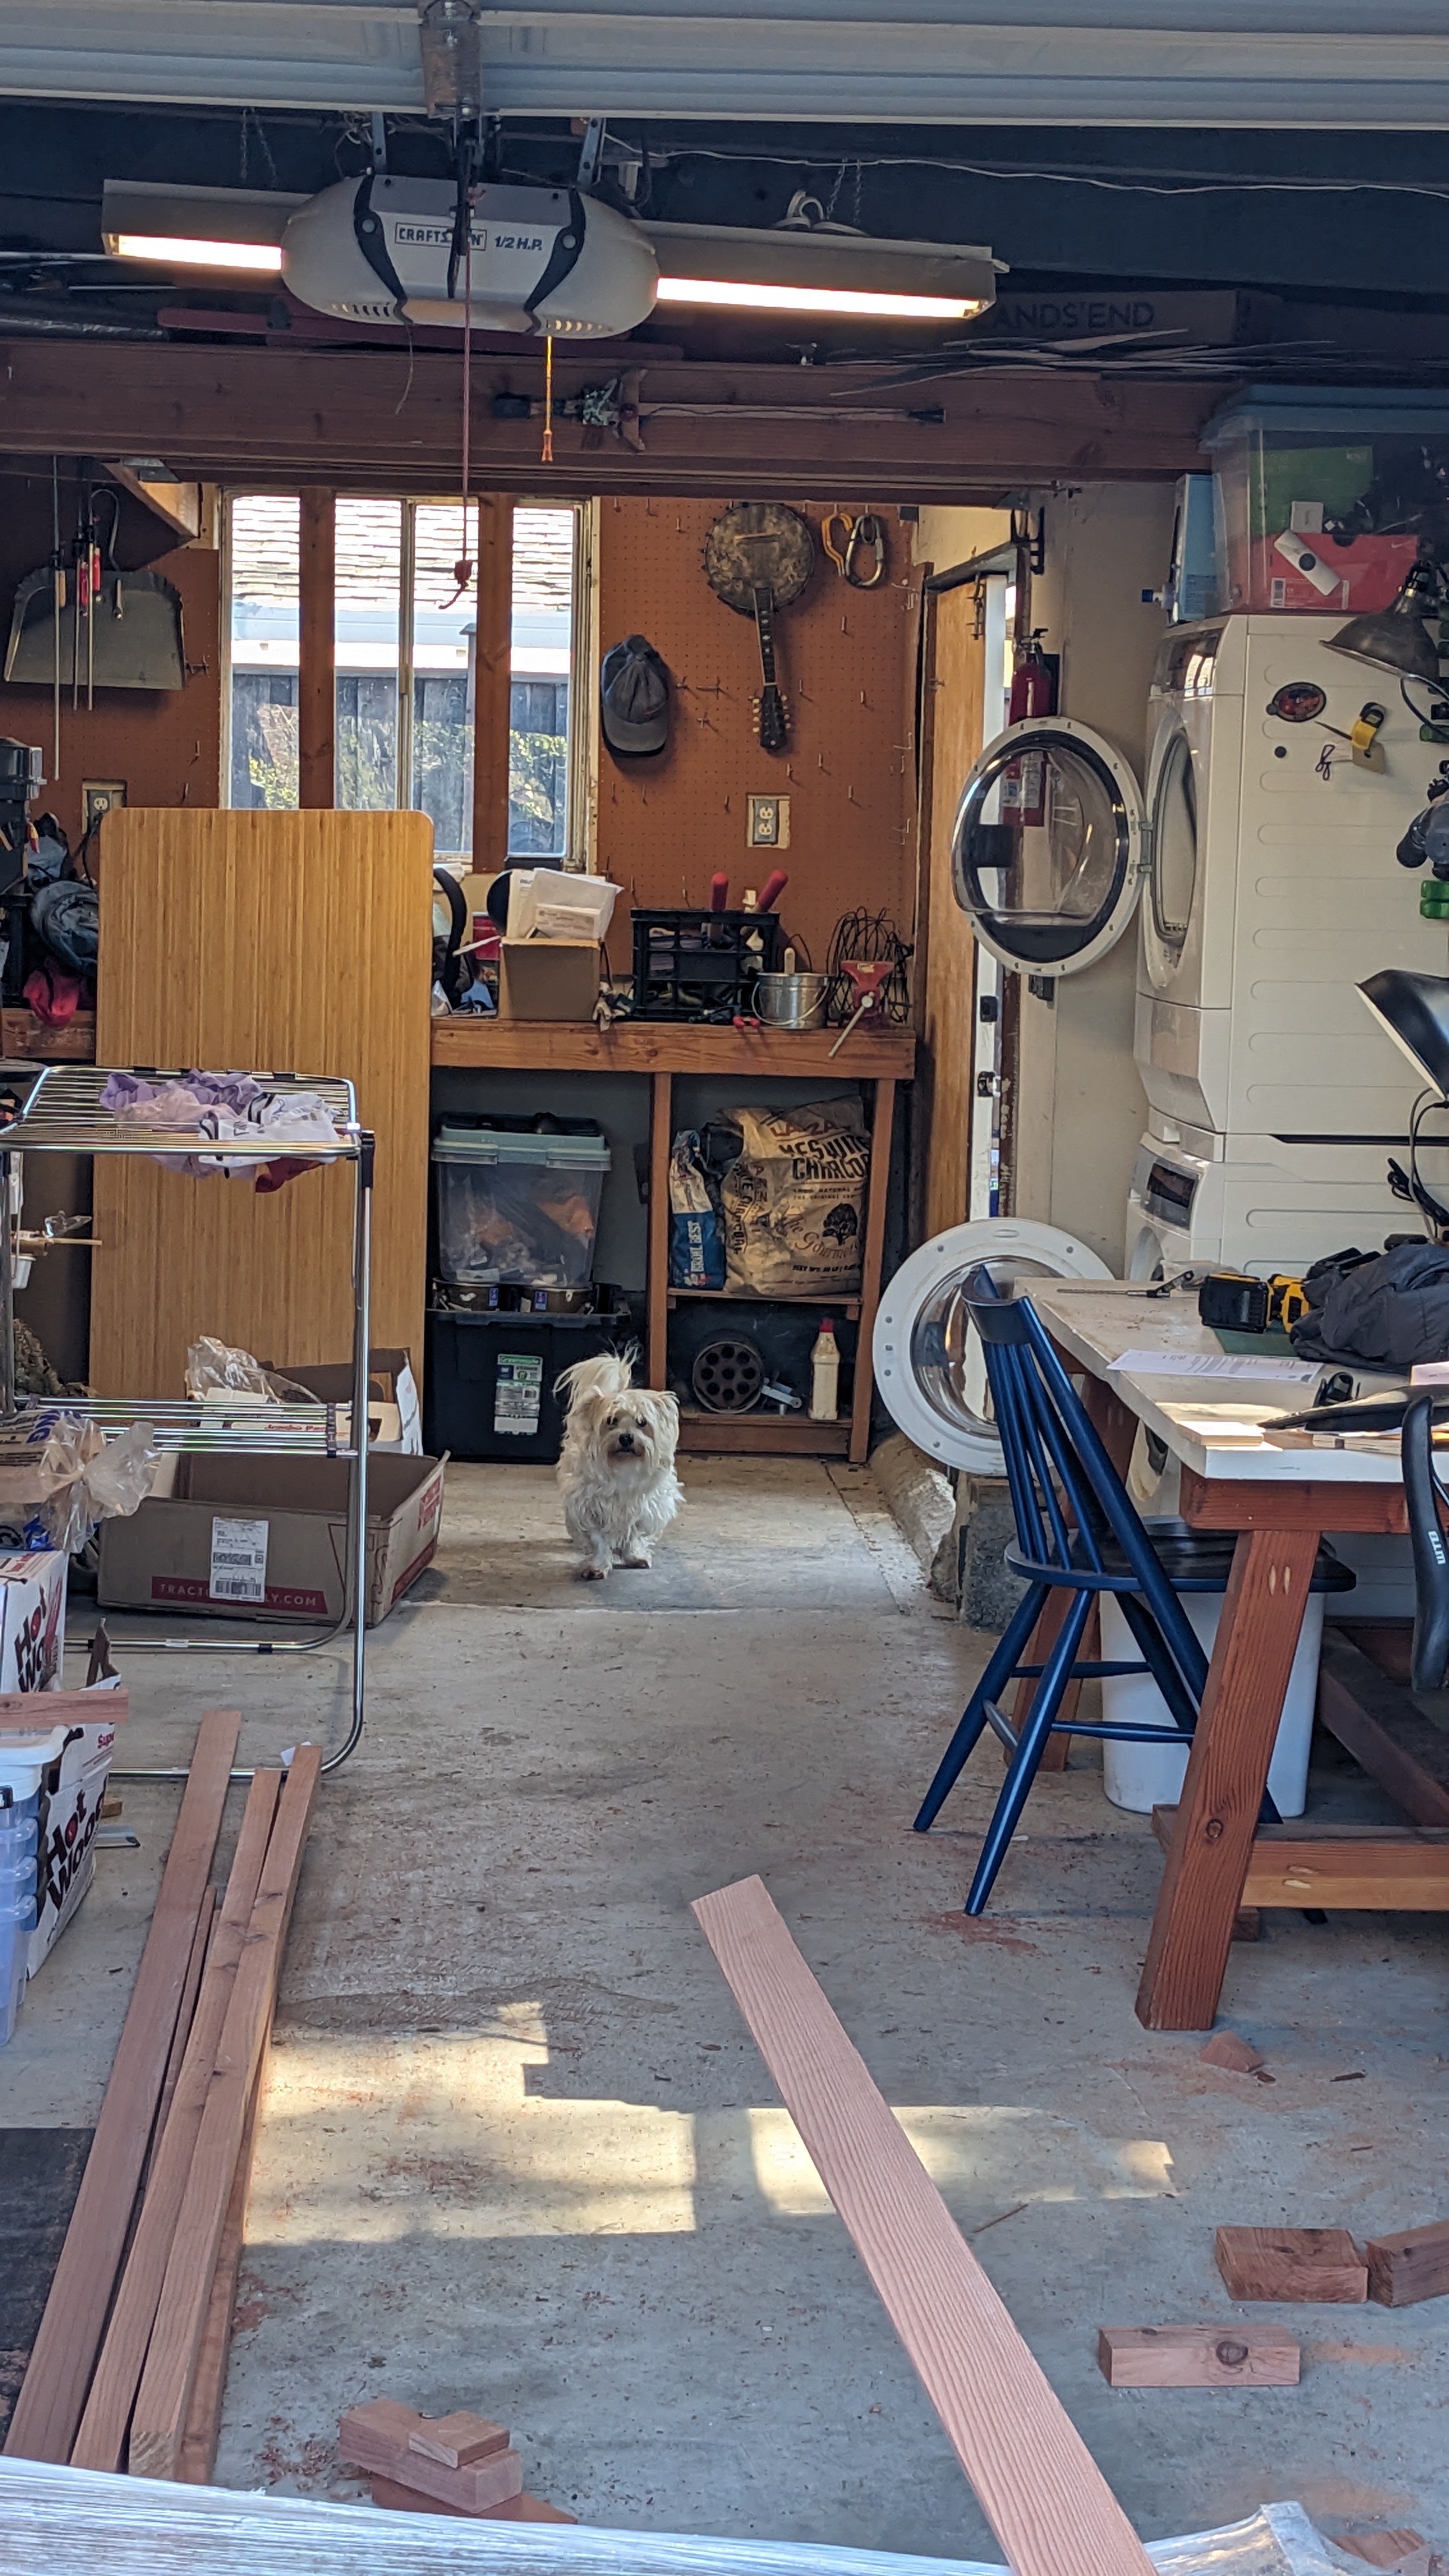
Our gate was busted!
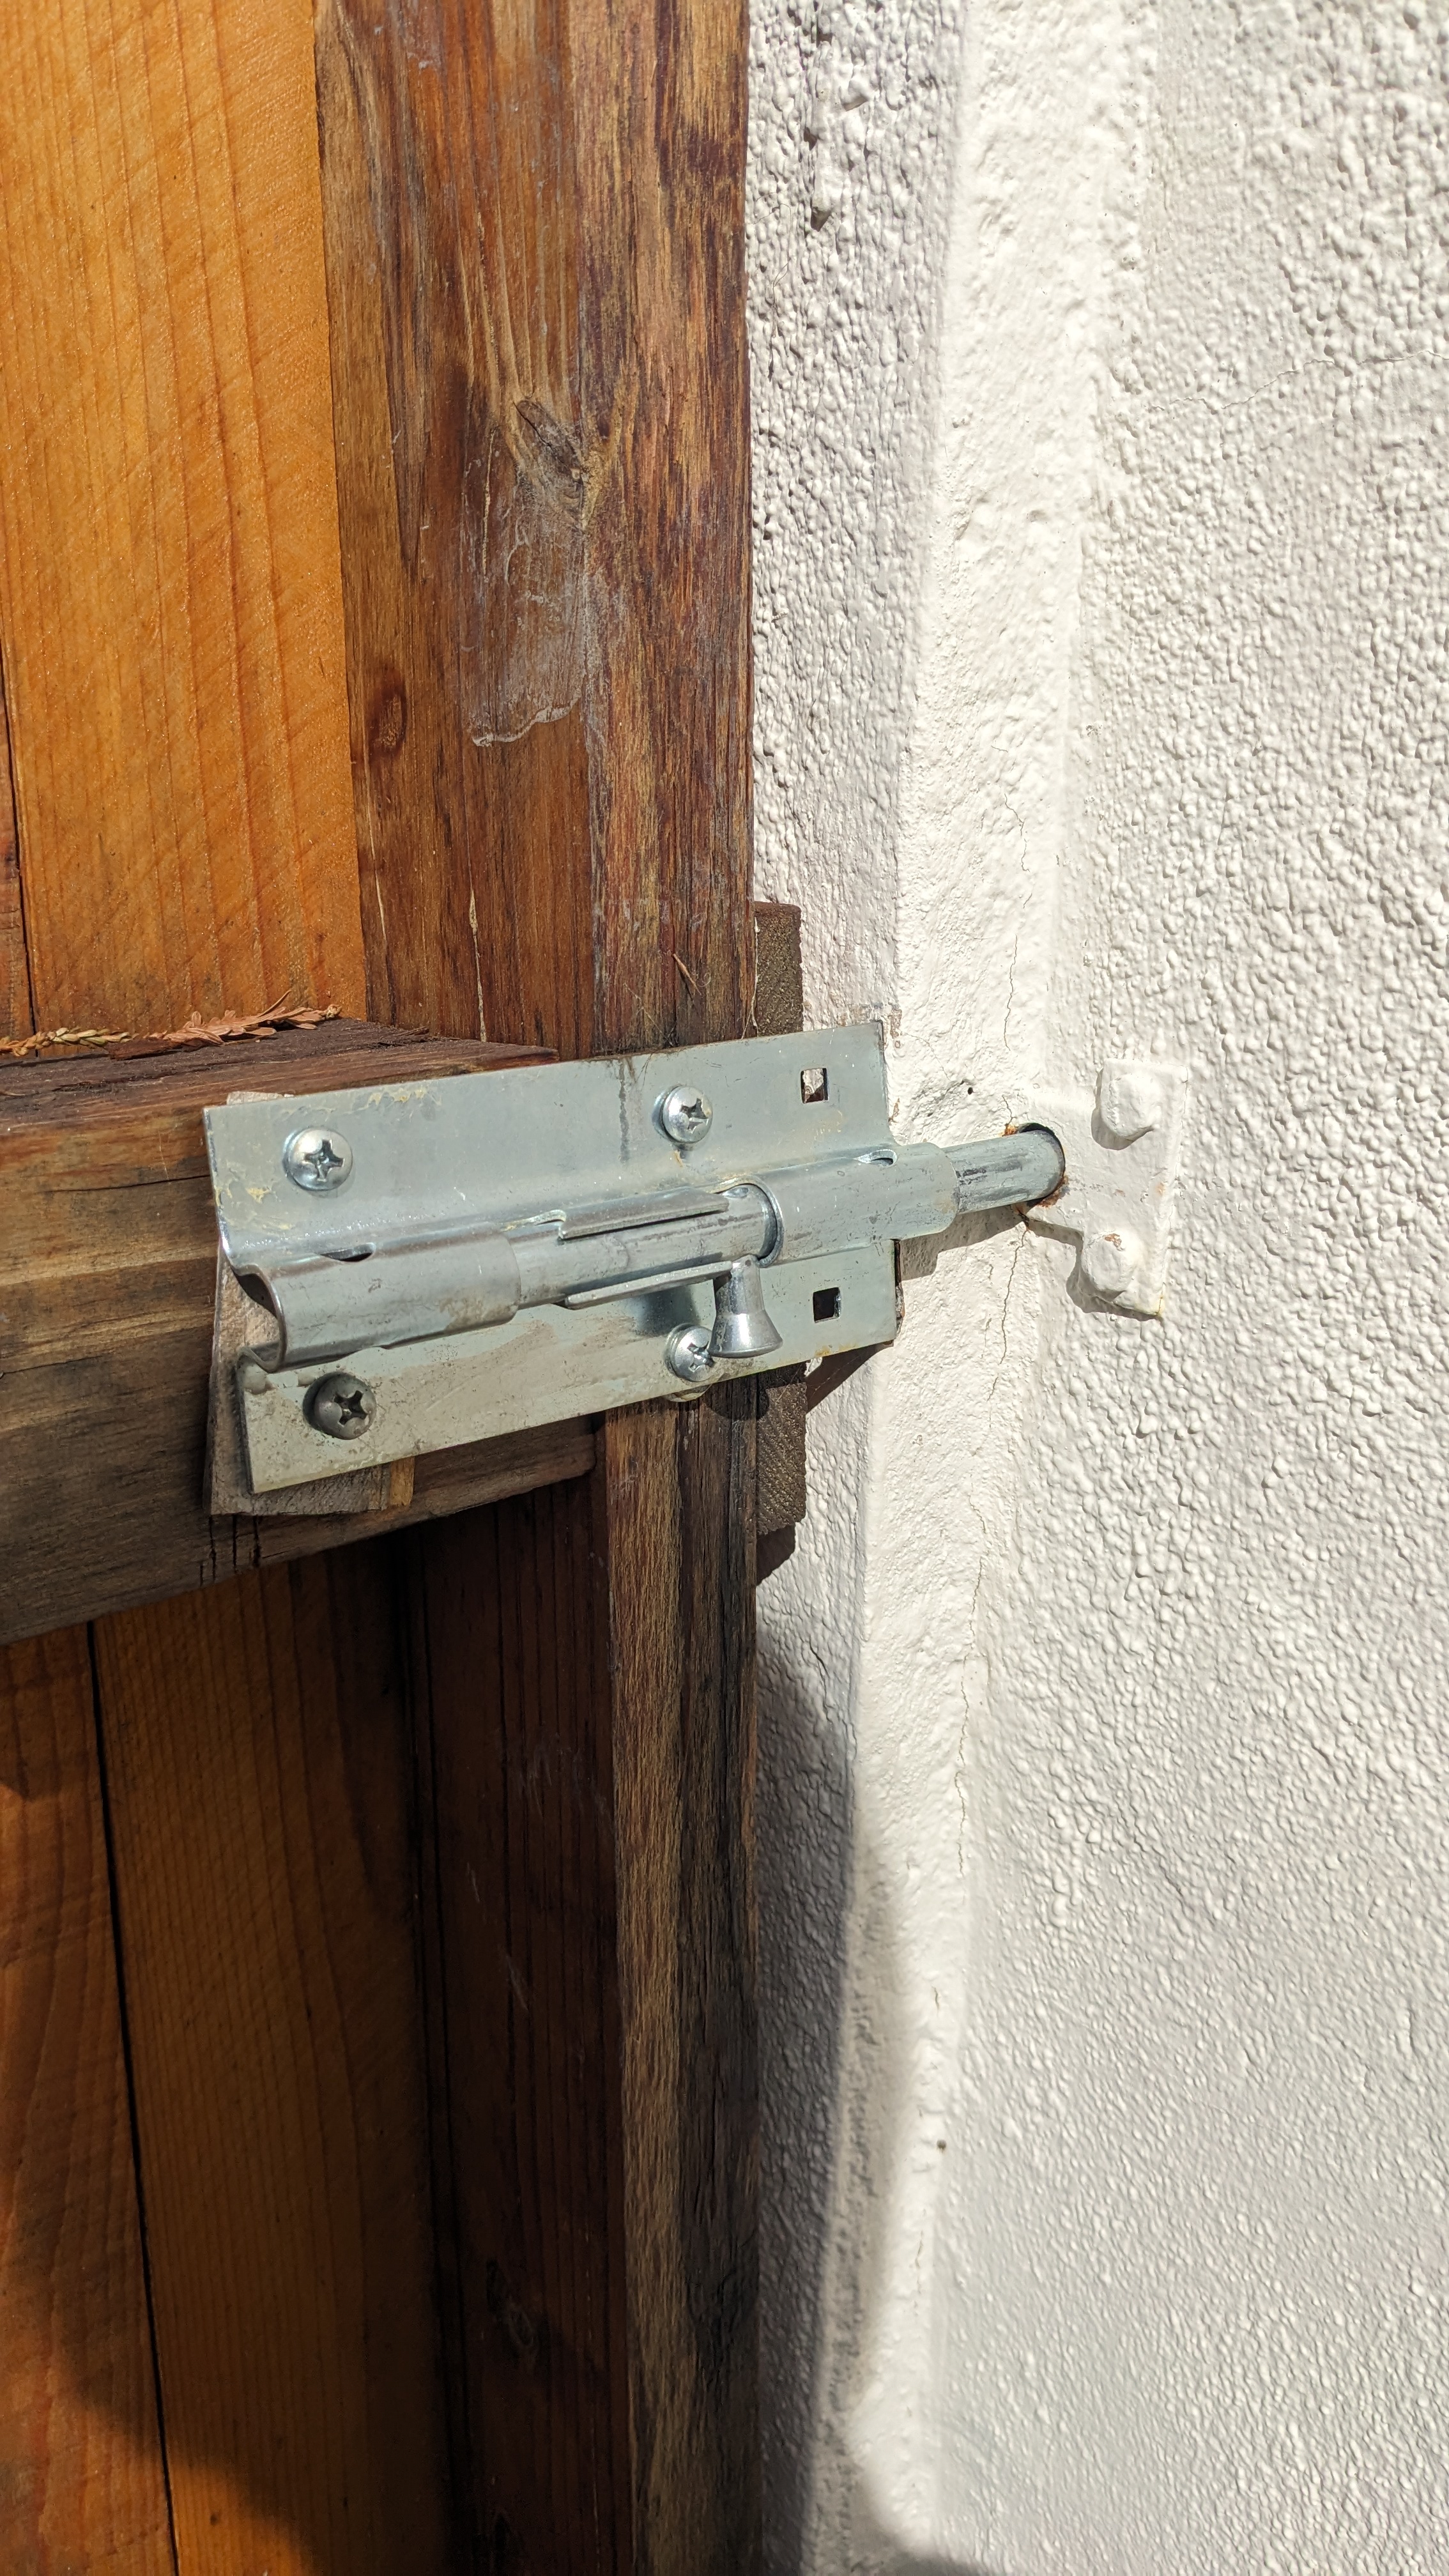
The hinges and fasteners aren't quite right on the wooden side. The hinges might also be mis-aligned. Also the brace is backwards. The stucco wall on the left seems to have cinderblock underneath and the fasteners in there are mostly tight. The bolting latch is also no good, too easy to get stuck, and we'd like to be able to open it from the outside, which we currently cannot!

Inspiration, Measurements, Design
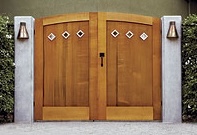
I really liked this style from Julian Hodges, with the recessed slats and curved top and thicker base. But how to curve the top.. This group in LA, ATD Gates, made a cool double-square design, evocative! I looked at my buddy Trevor's handmade gate to think about how he framed things and whatnot.
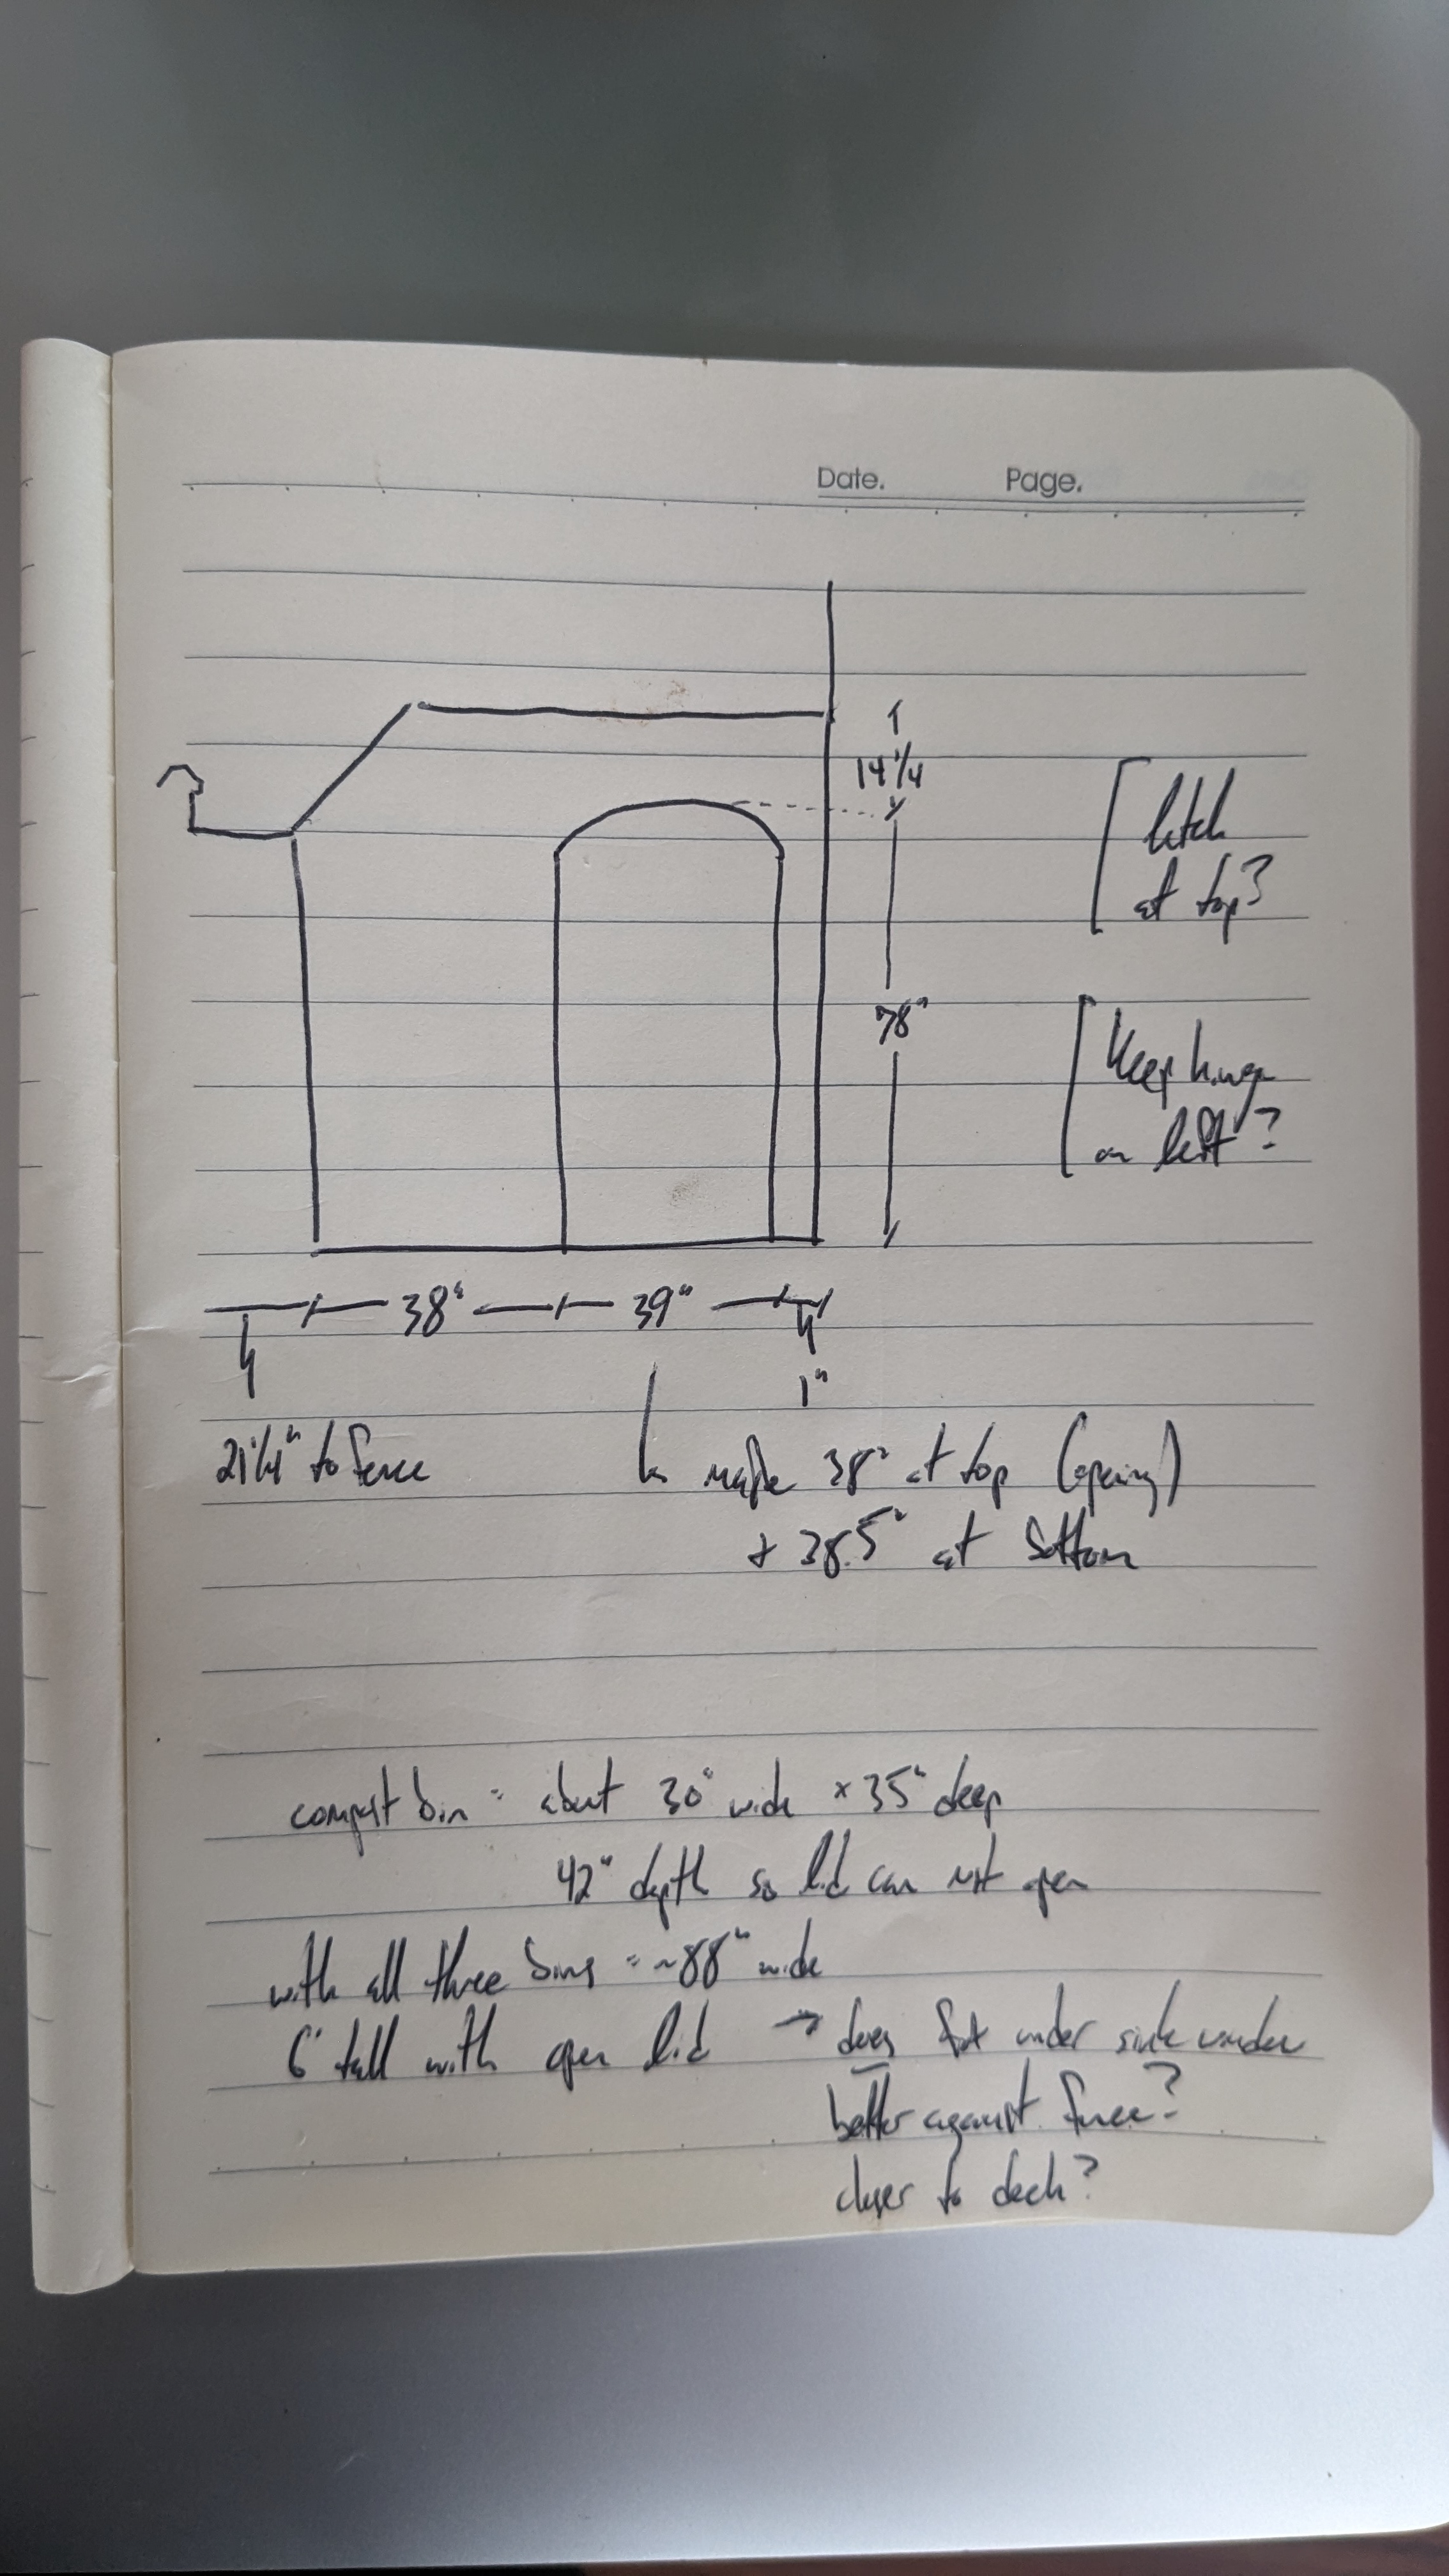
Ultimately I decided to redo the whole shebang, including the hinges. I took some measurements and thought about moving our large compost bin through the opening..
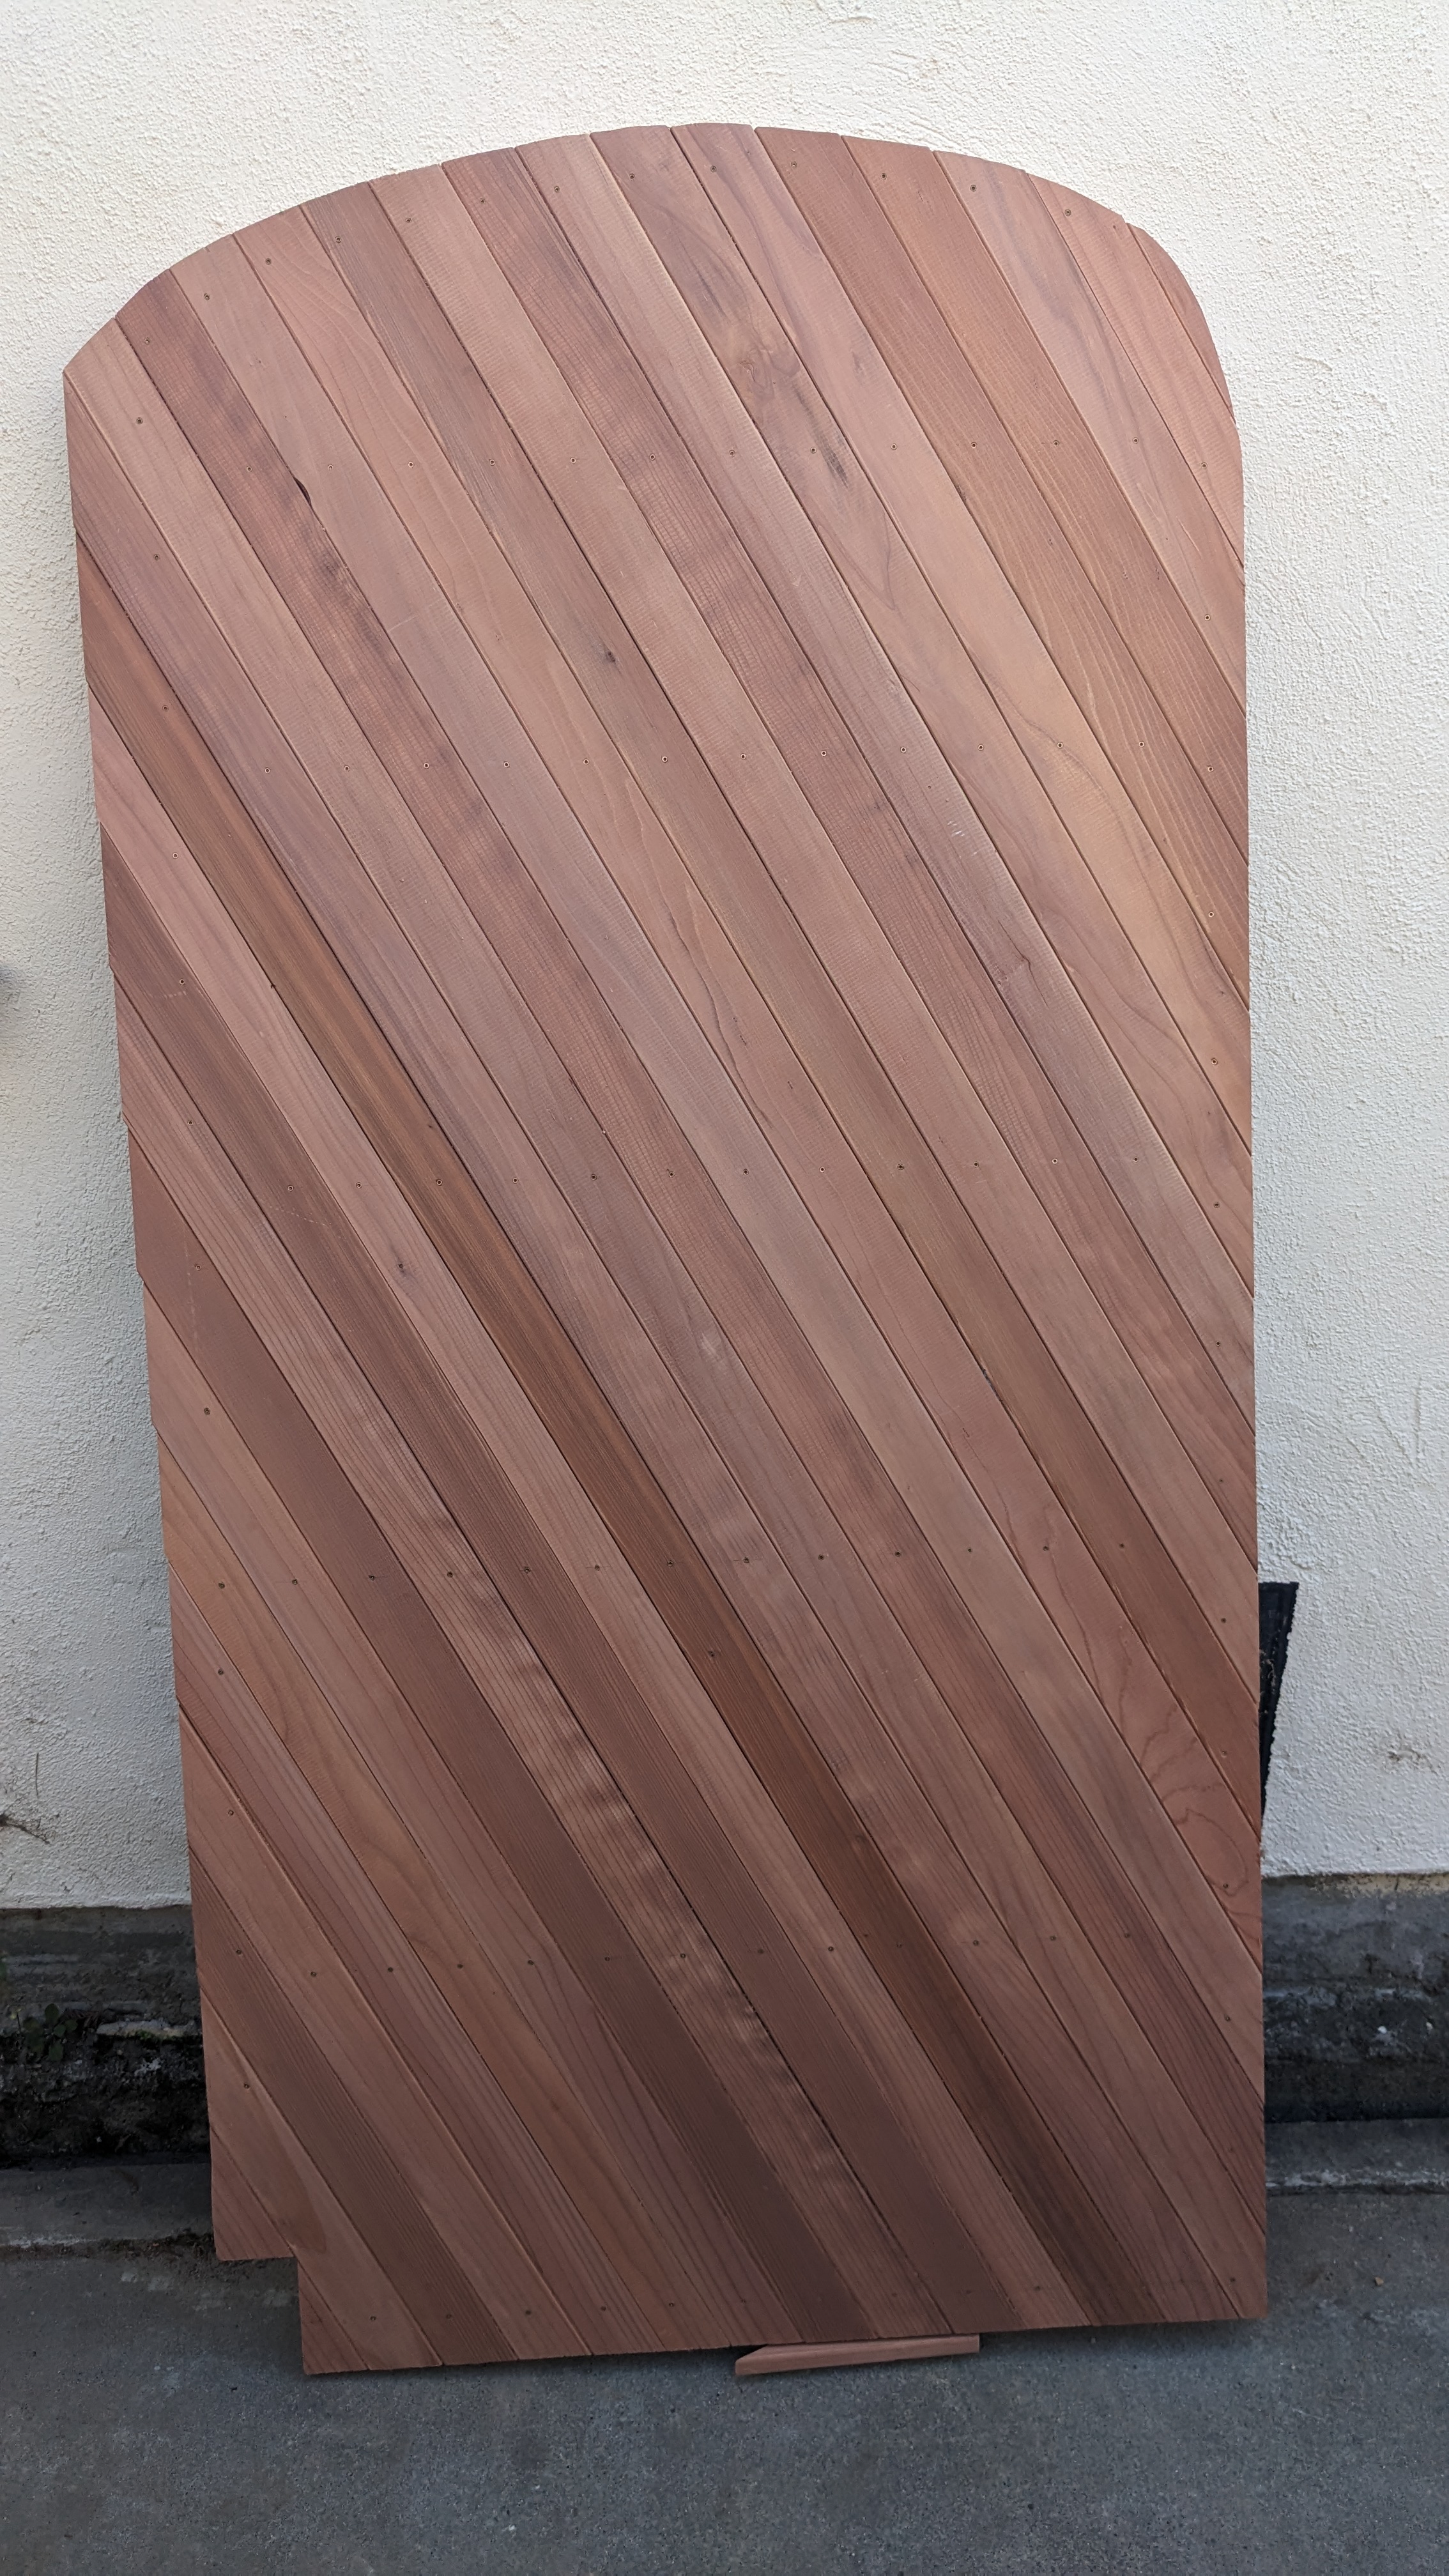
I made a design, got to looking at lumber and couldn't find what I wanted, so I redrew the plans at the store. A redwood frame with thin slats to cover the front in an arch, diagonal pattern to the slats for more cut-efficiency based on the lengths I was getting at the store and fitting in my car. Fasteners: I nearly talked myself into doing a hidden fastener system so that the front surface could be really clean.. I had big thoughts about custom clips or knock-off cheap clips..and the dados I'd have to cut somehow..I'm glad I didn't do that! I ultimately just went with trim screws in a nice pattern.


Framing
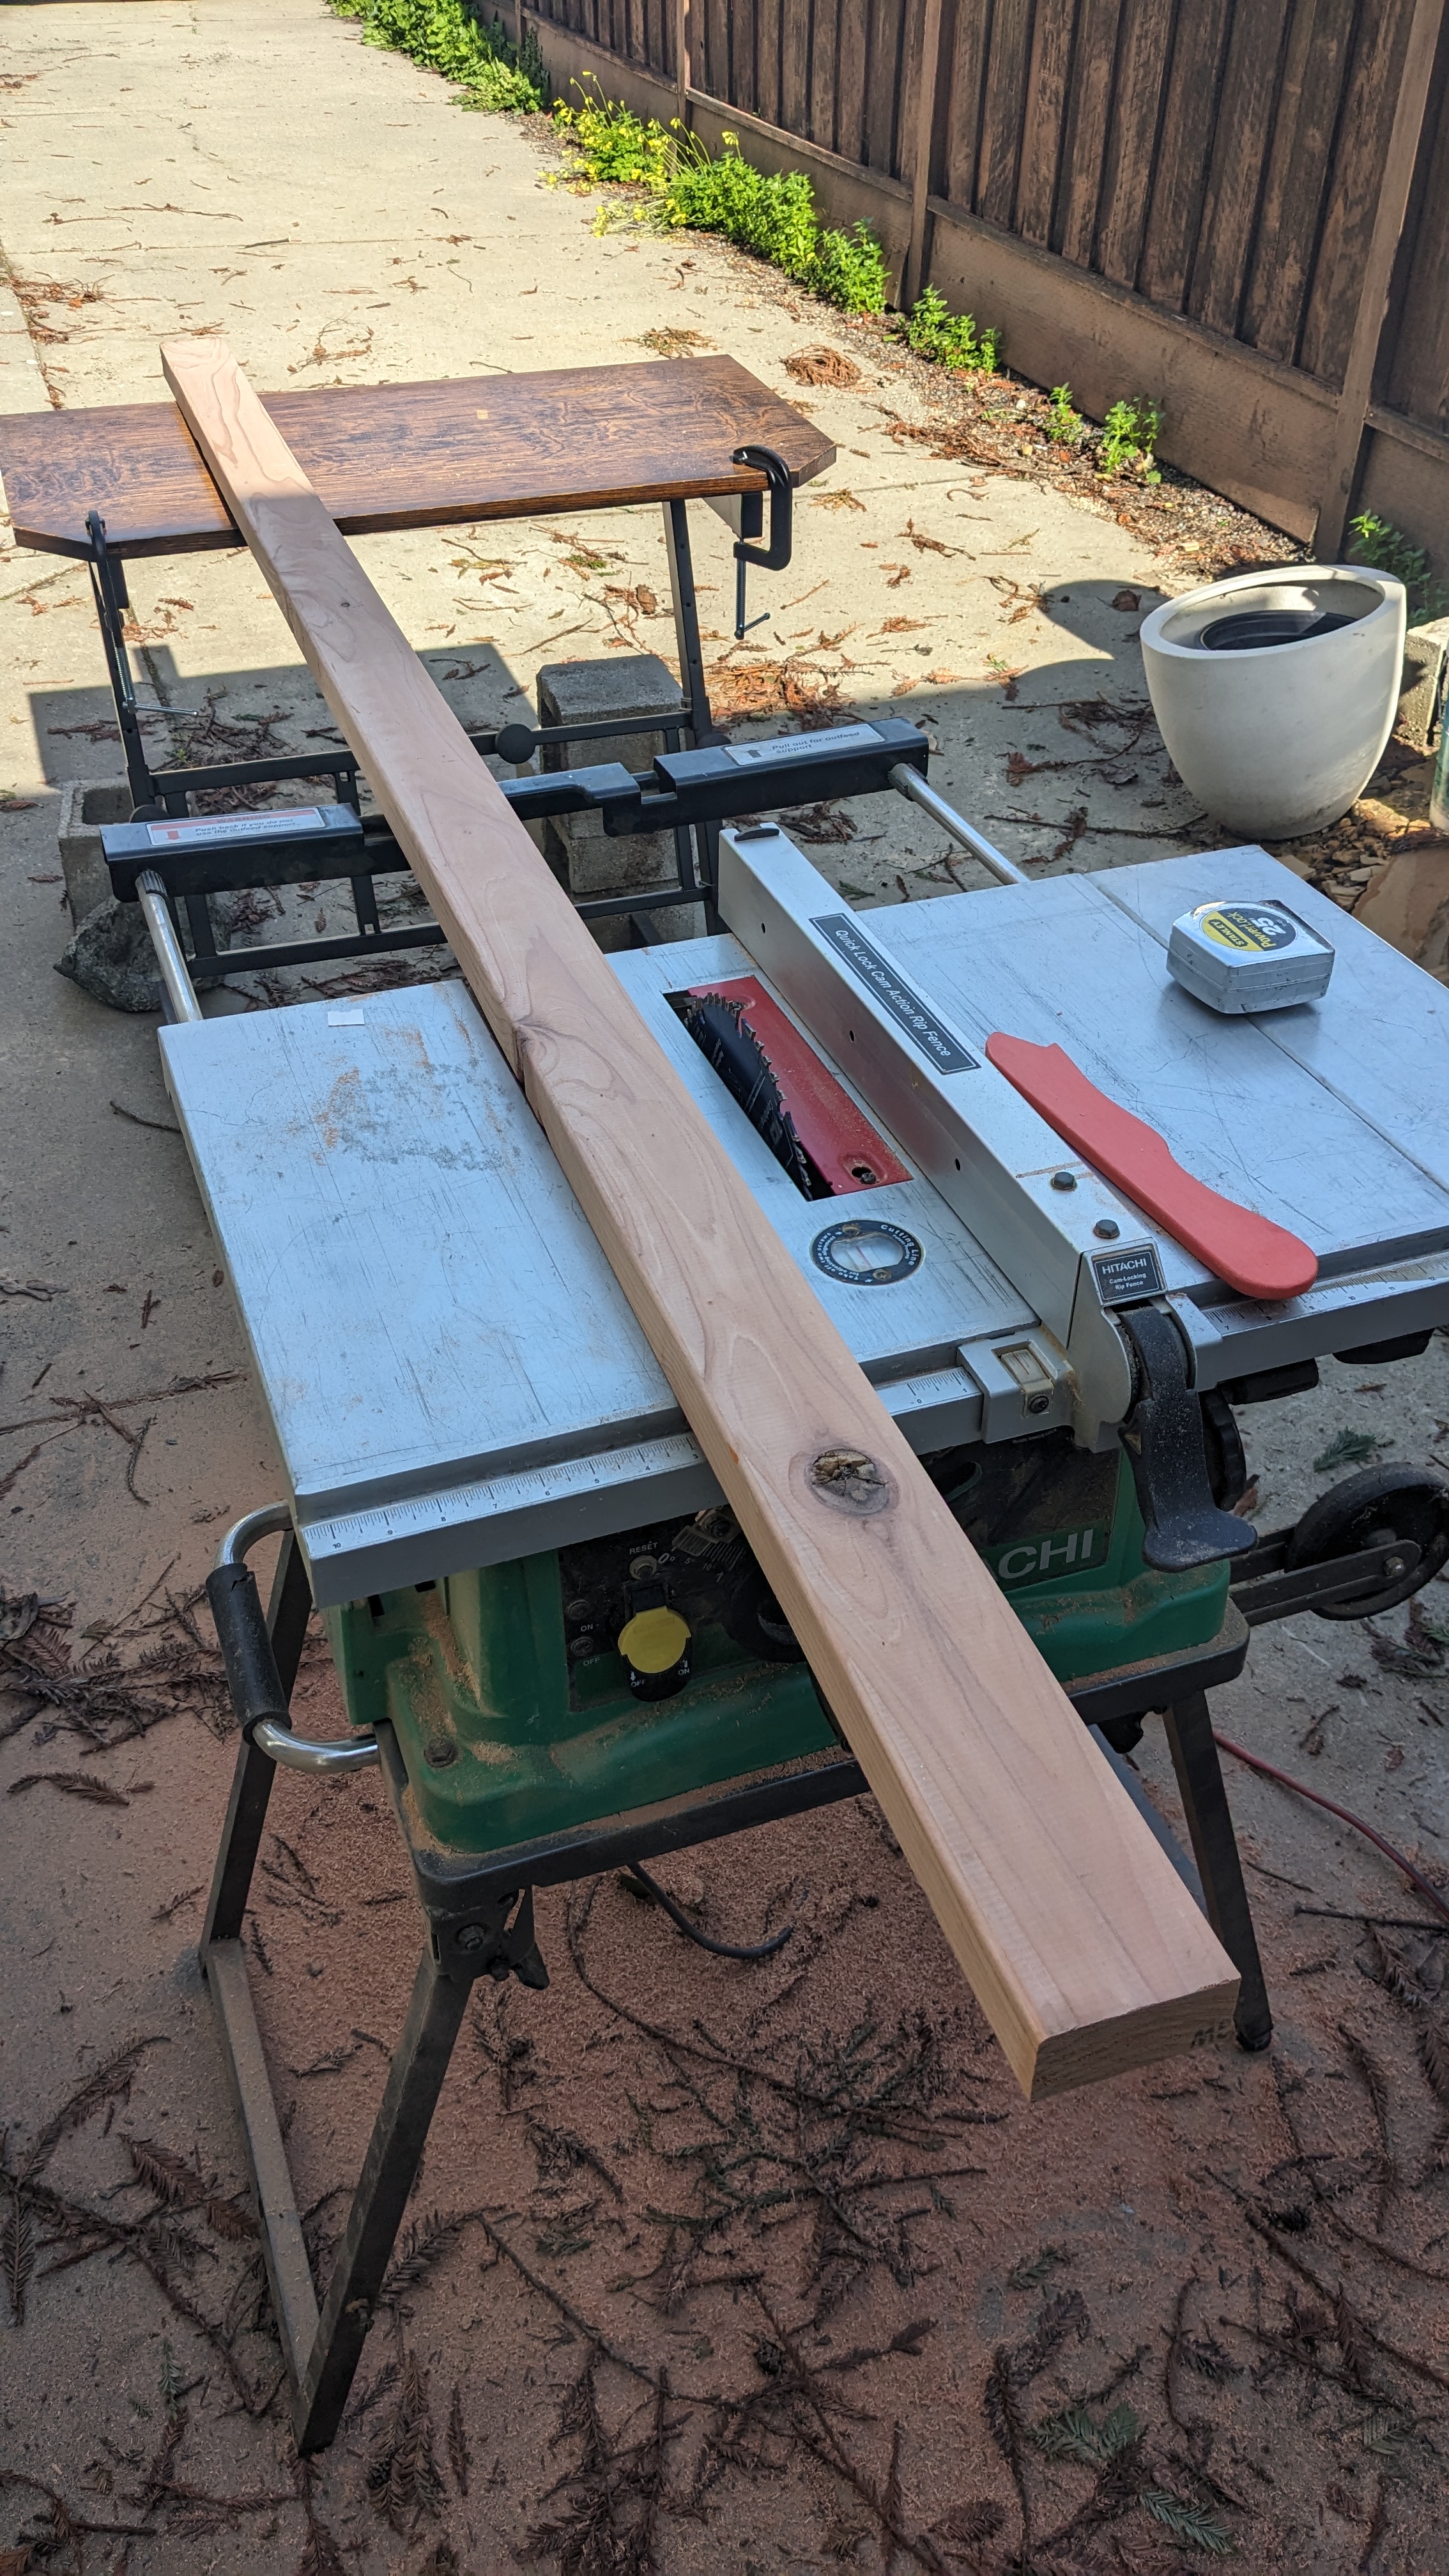
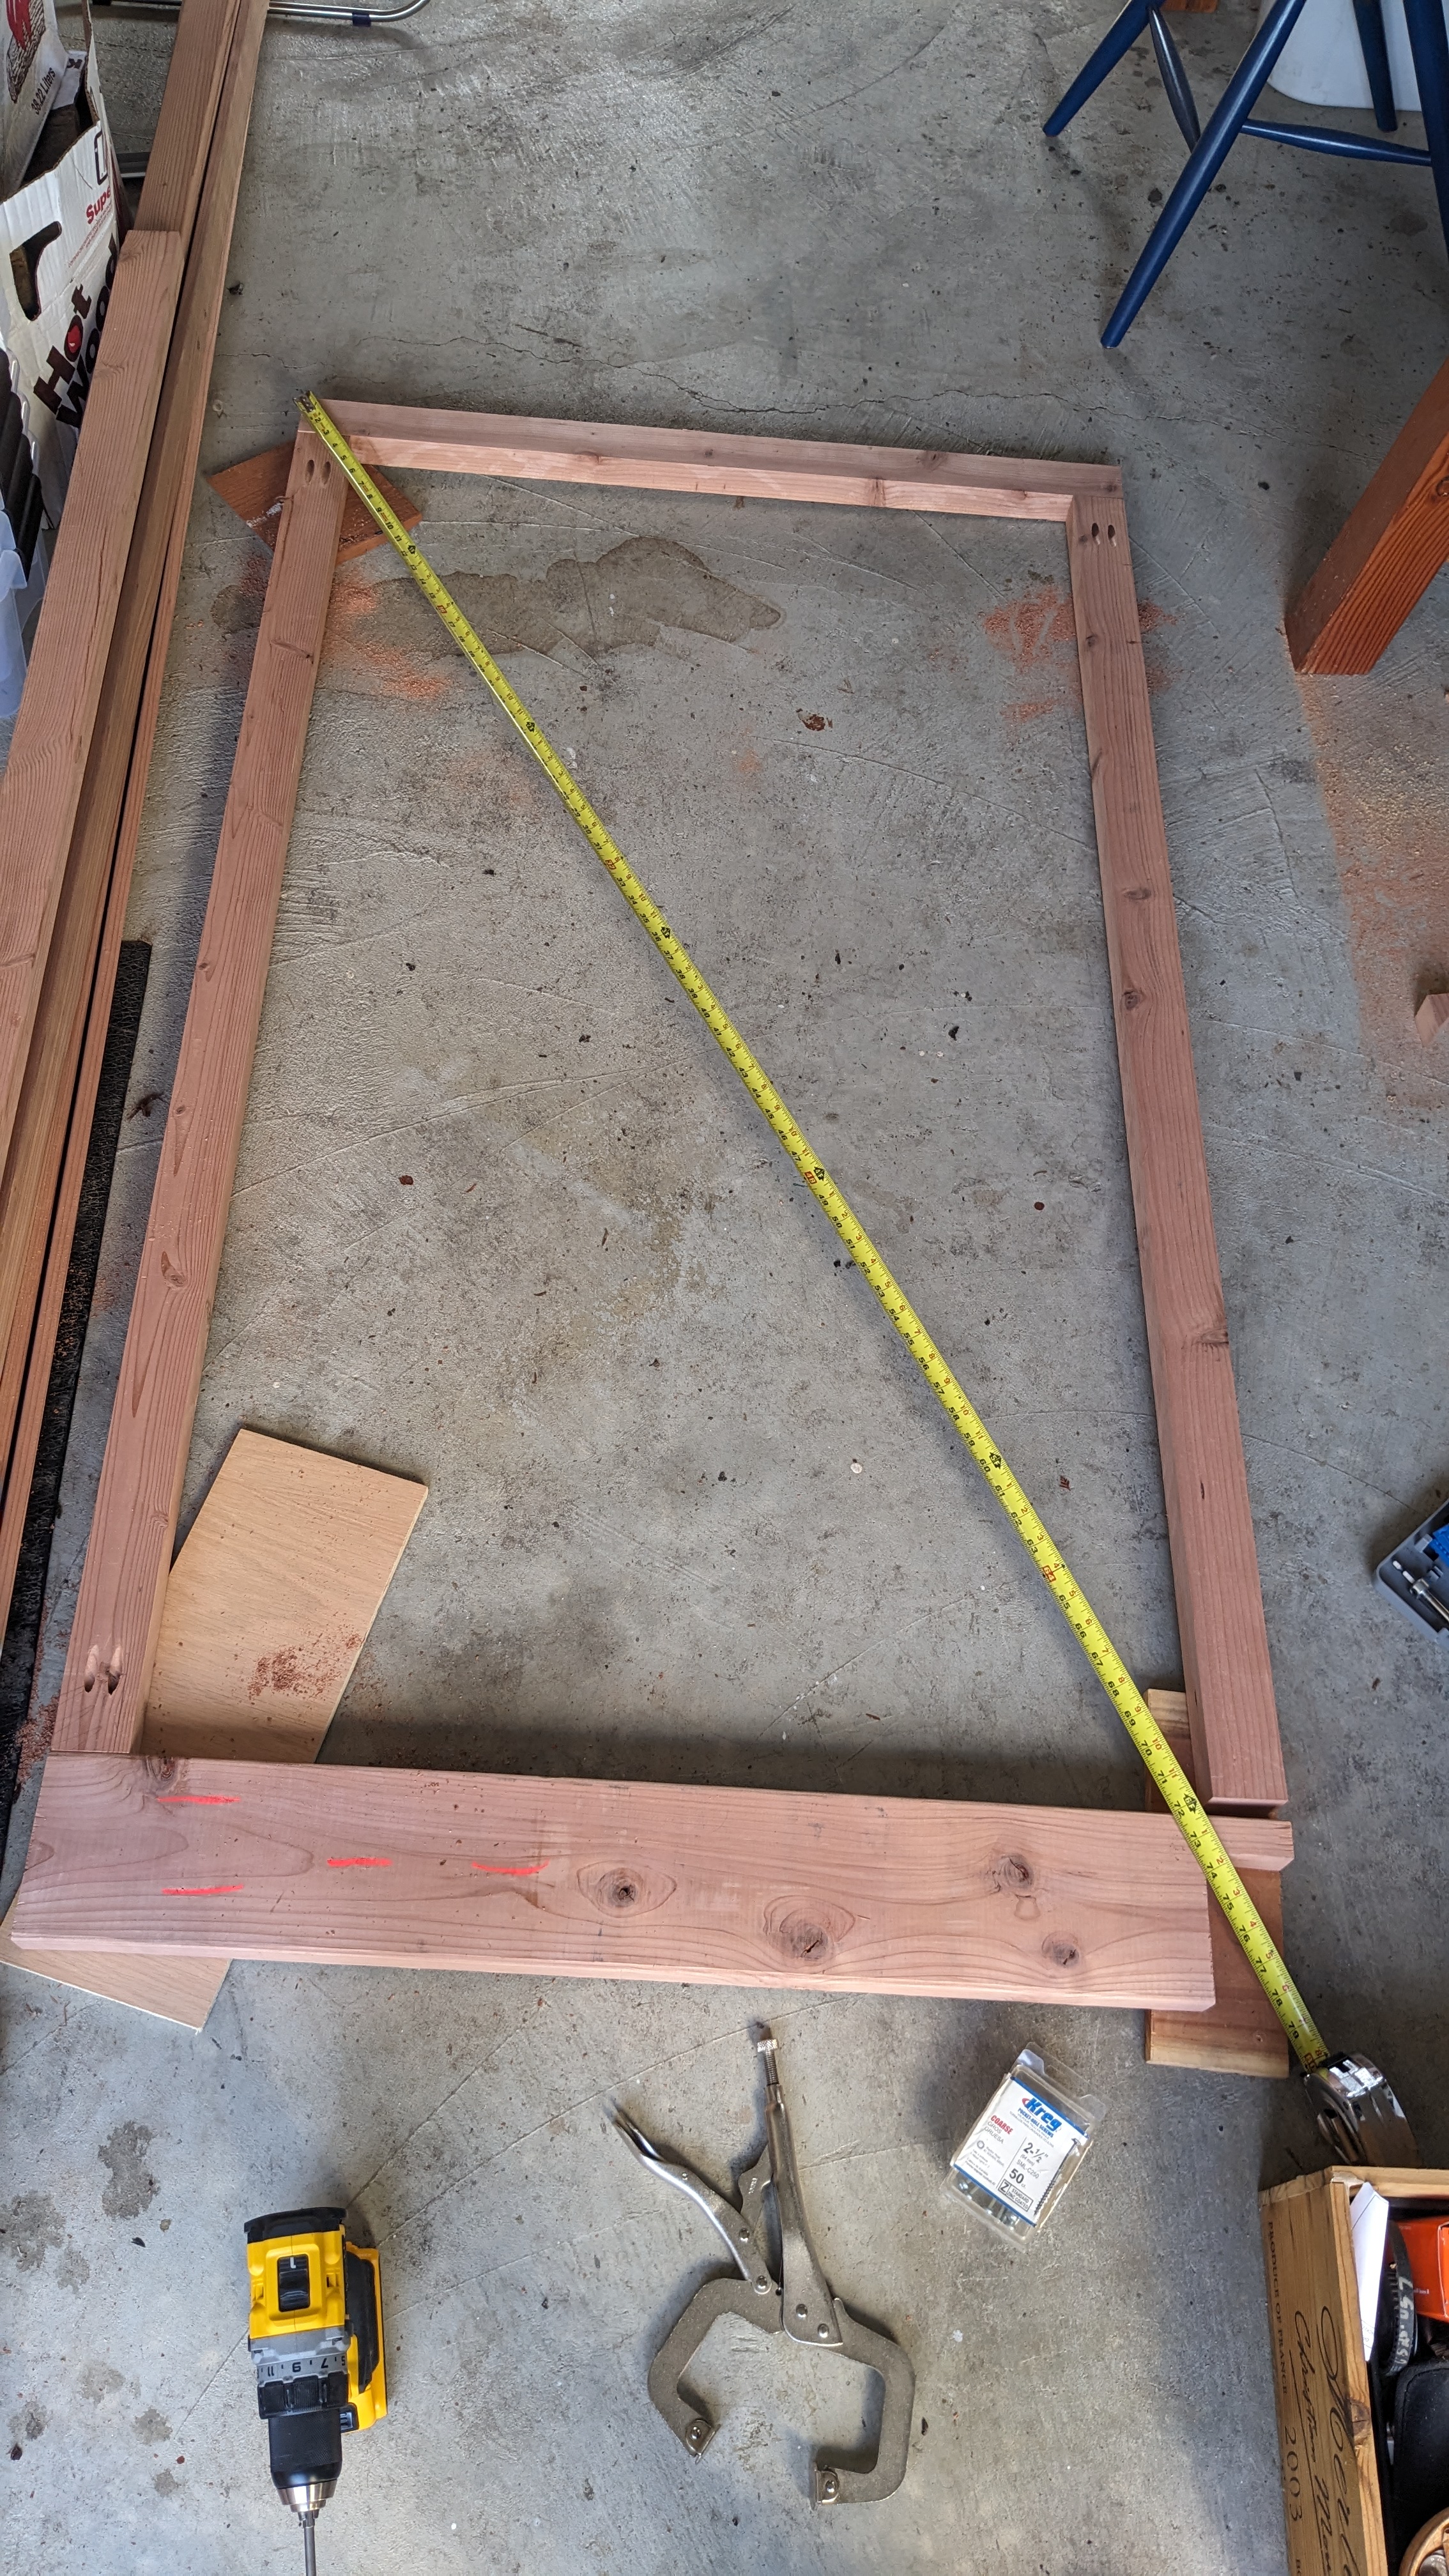
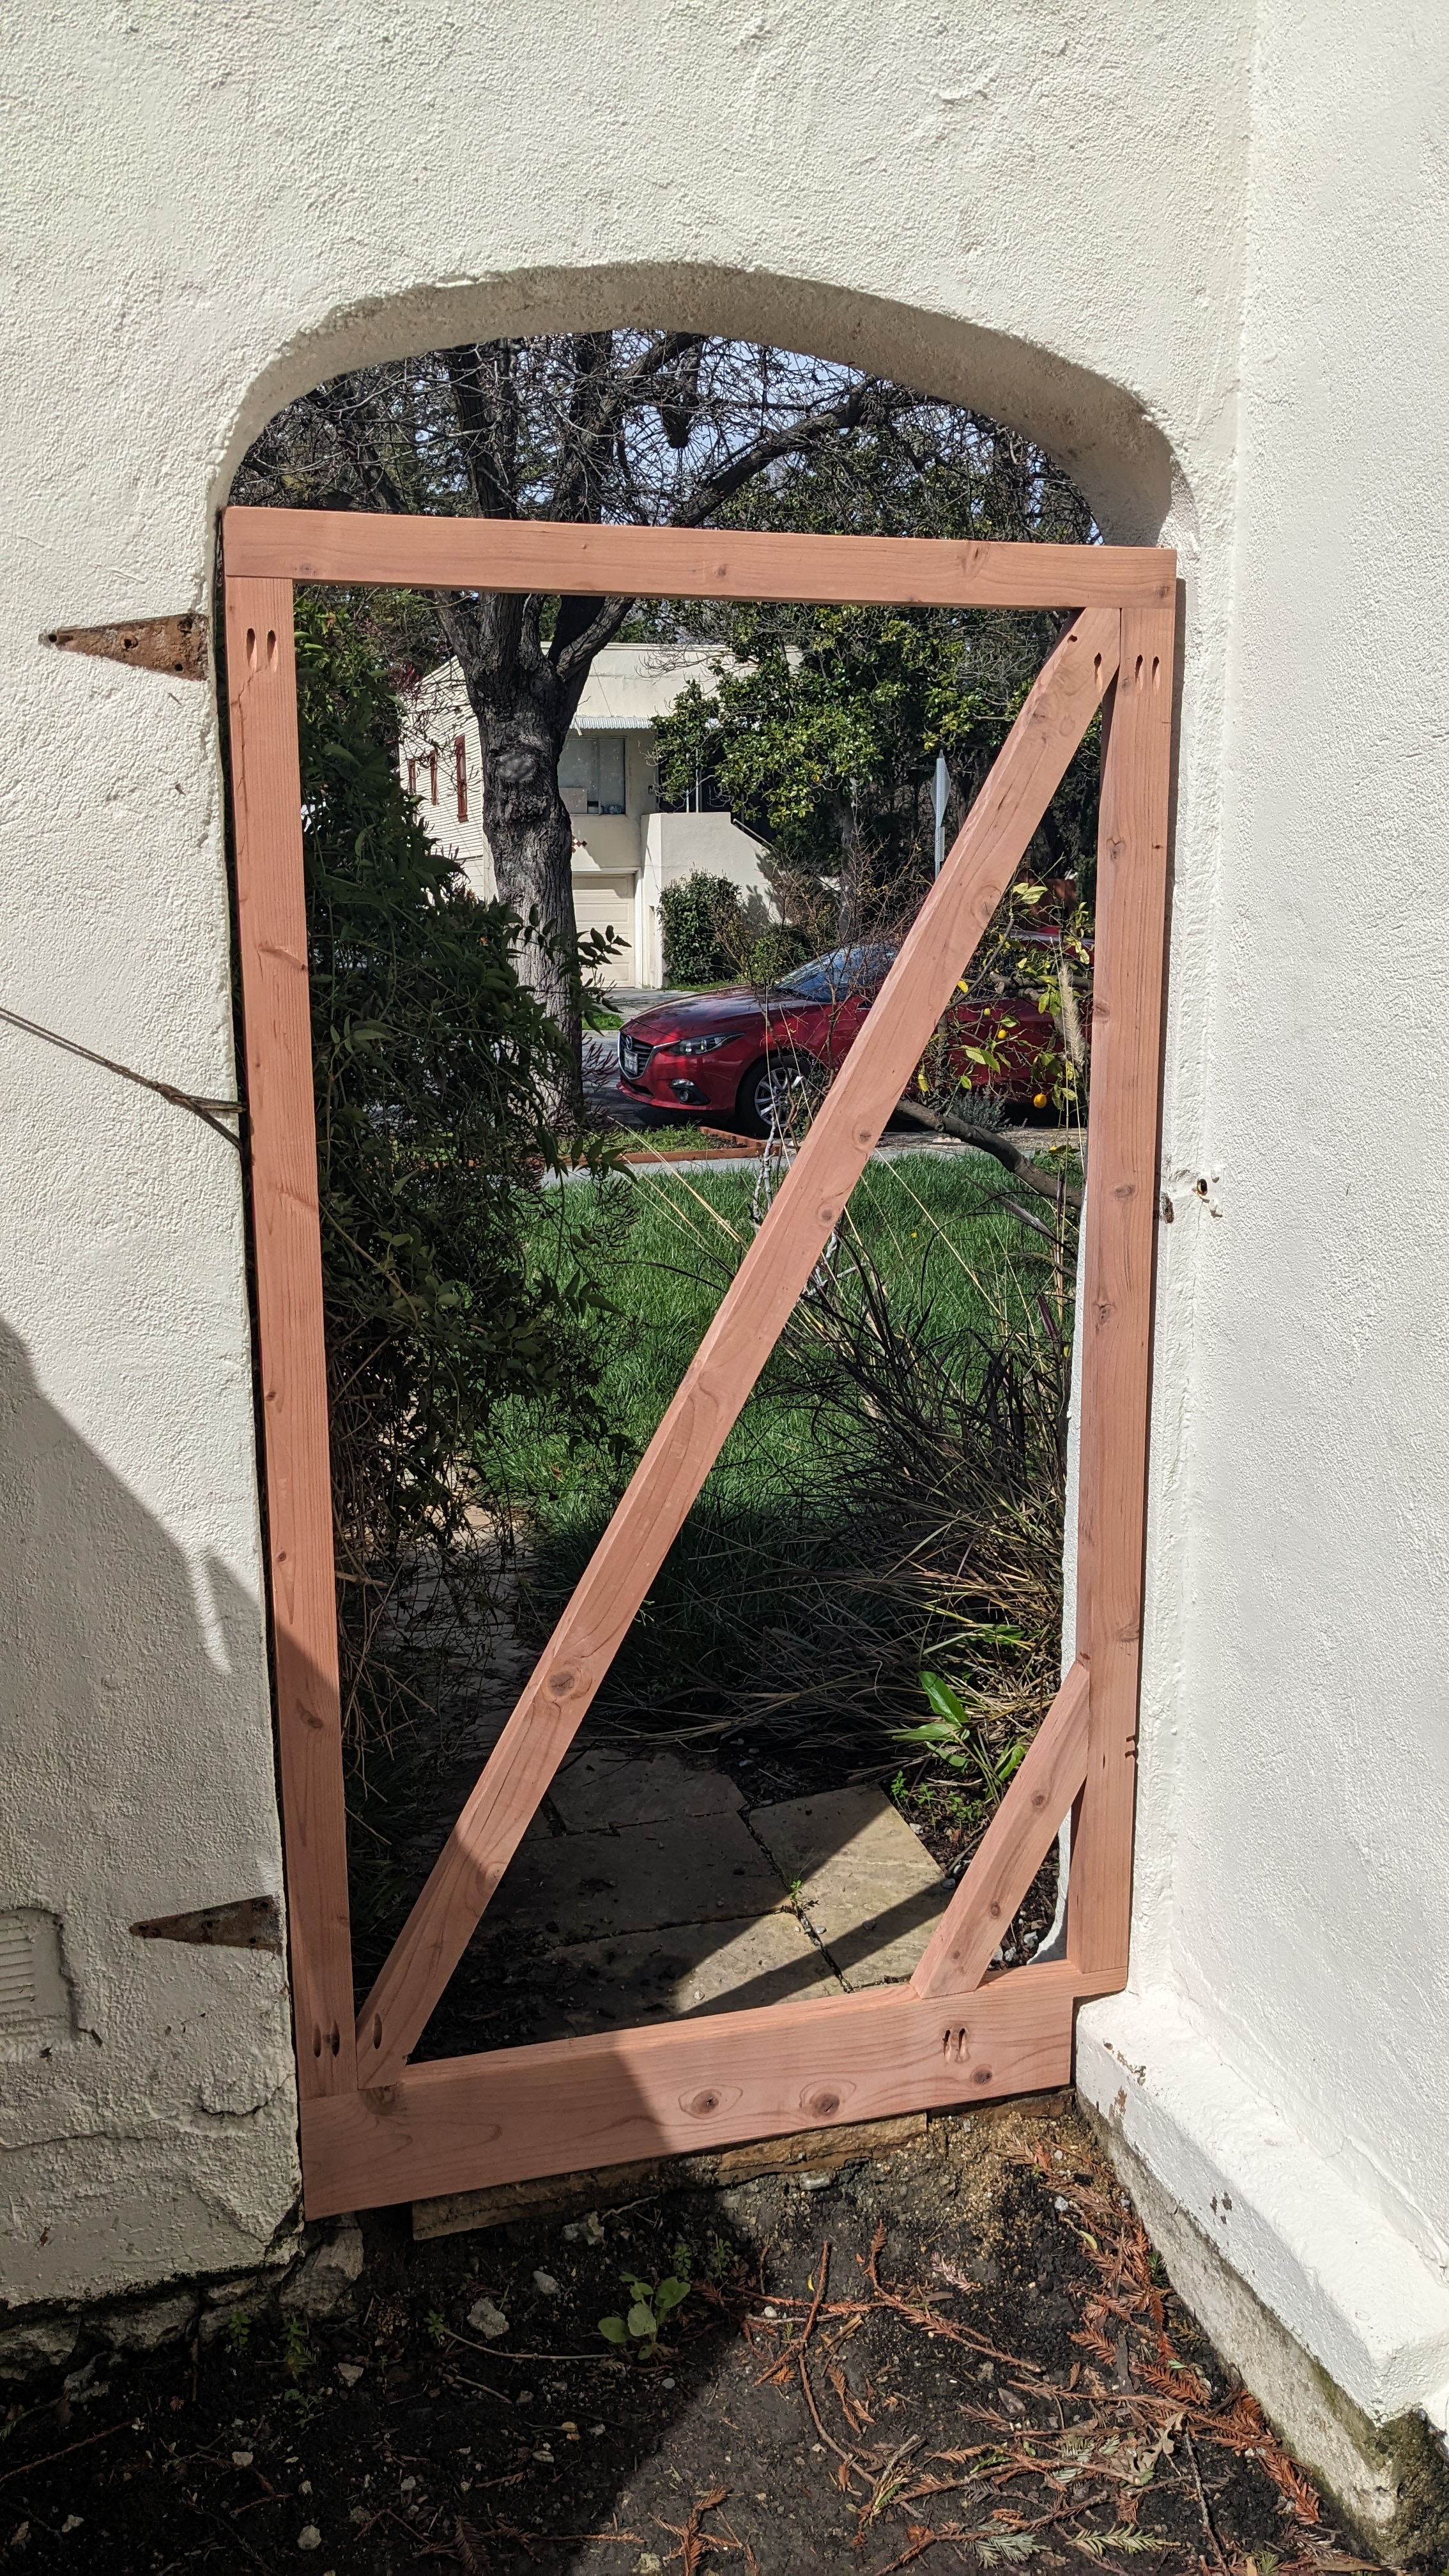
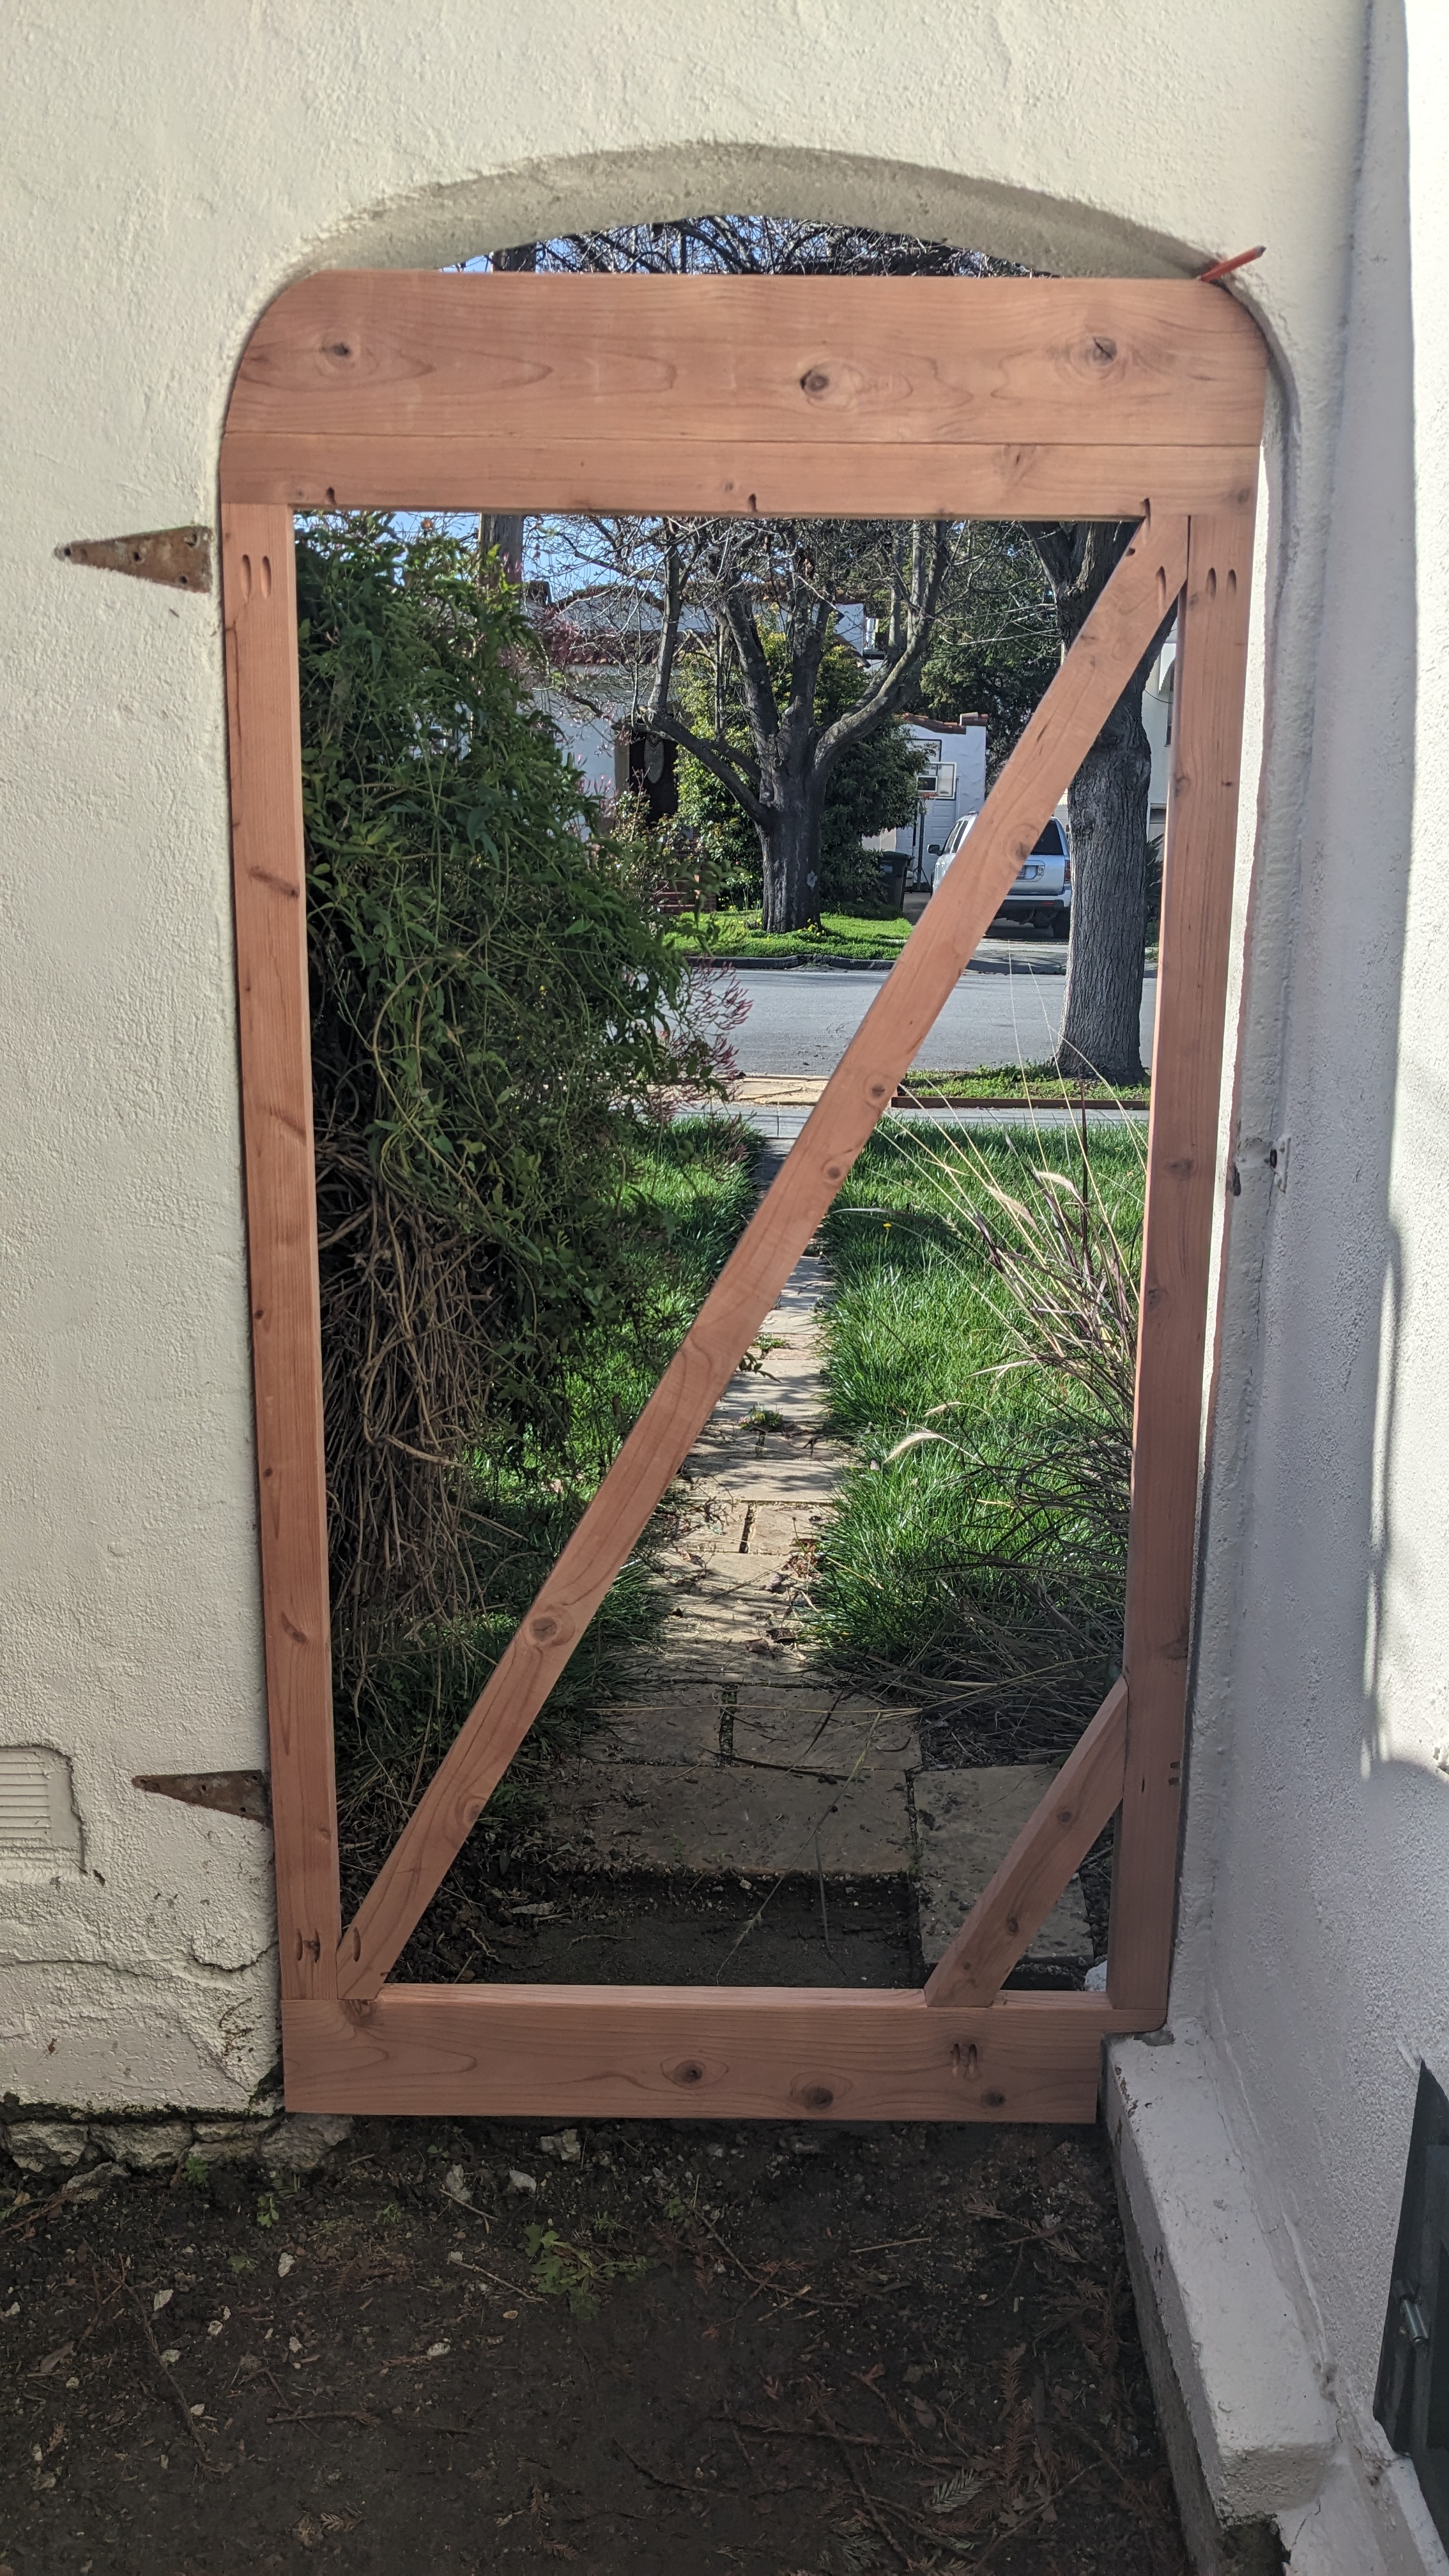
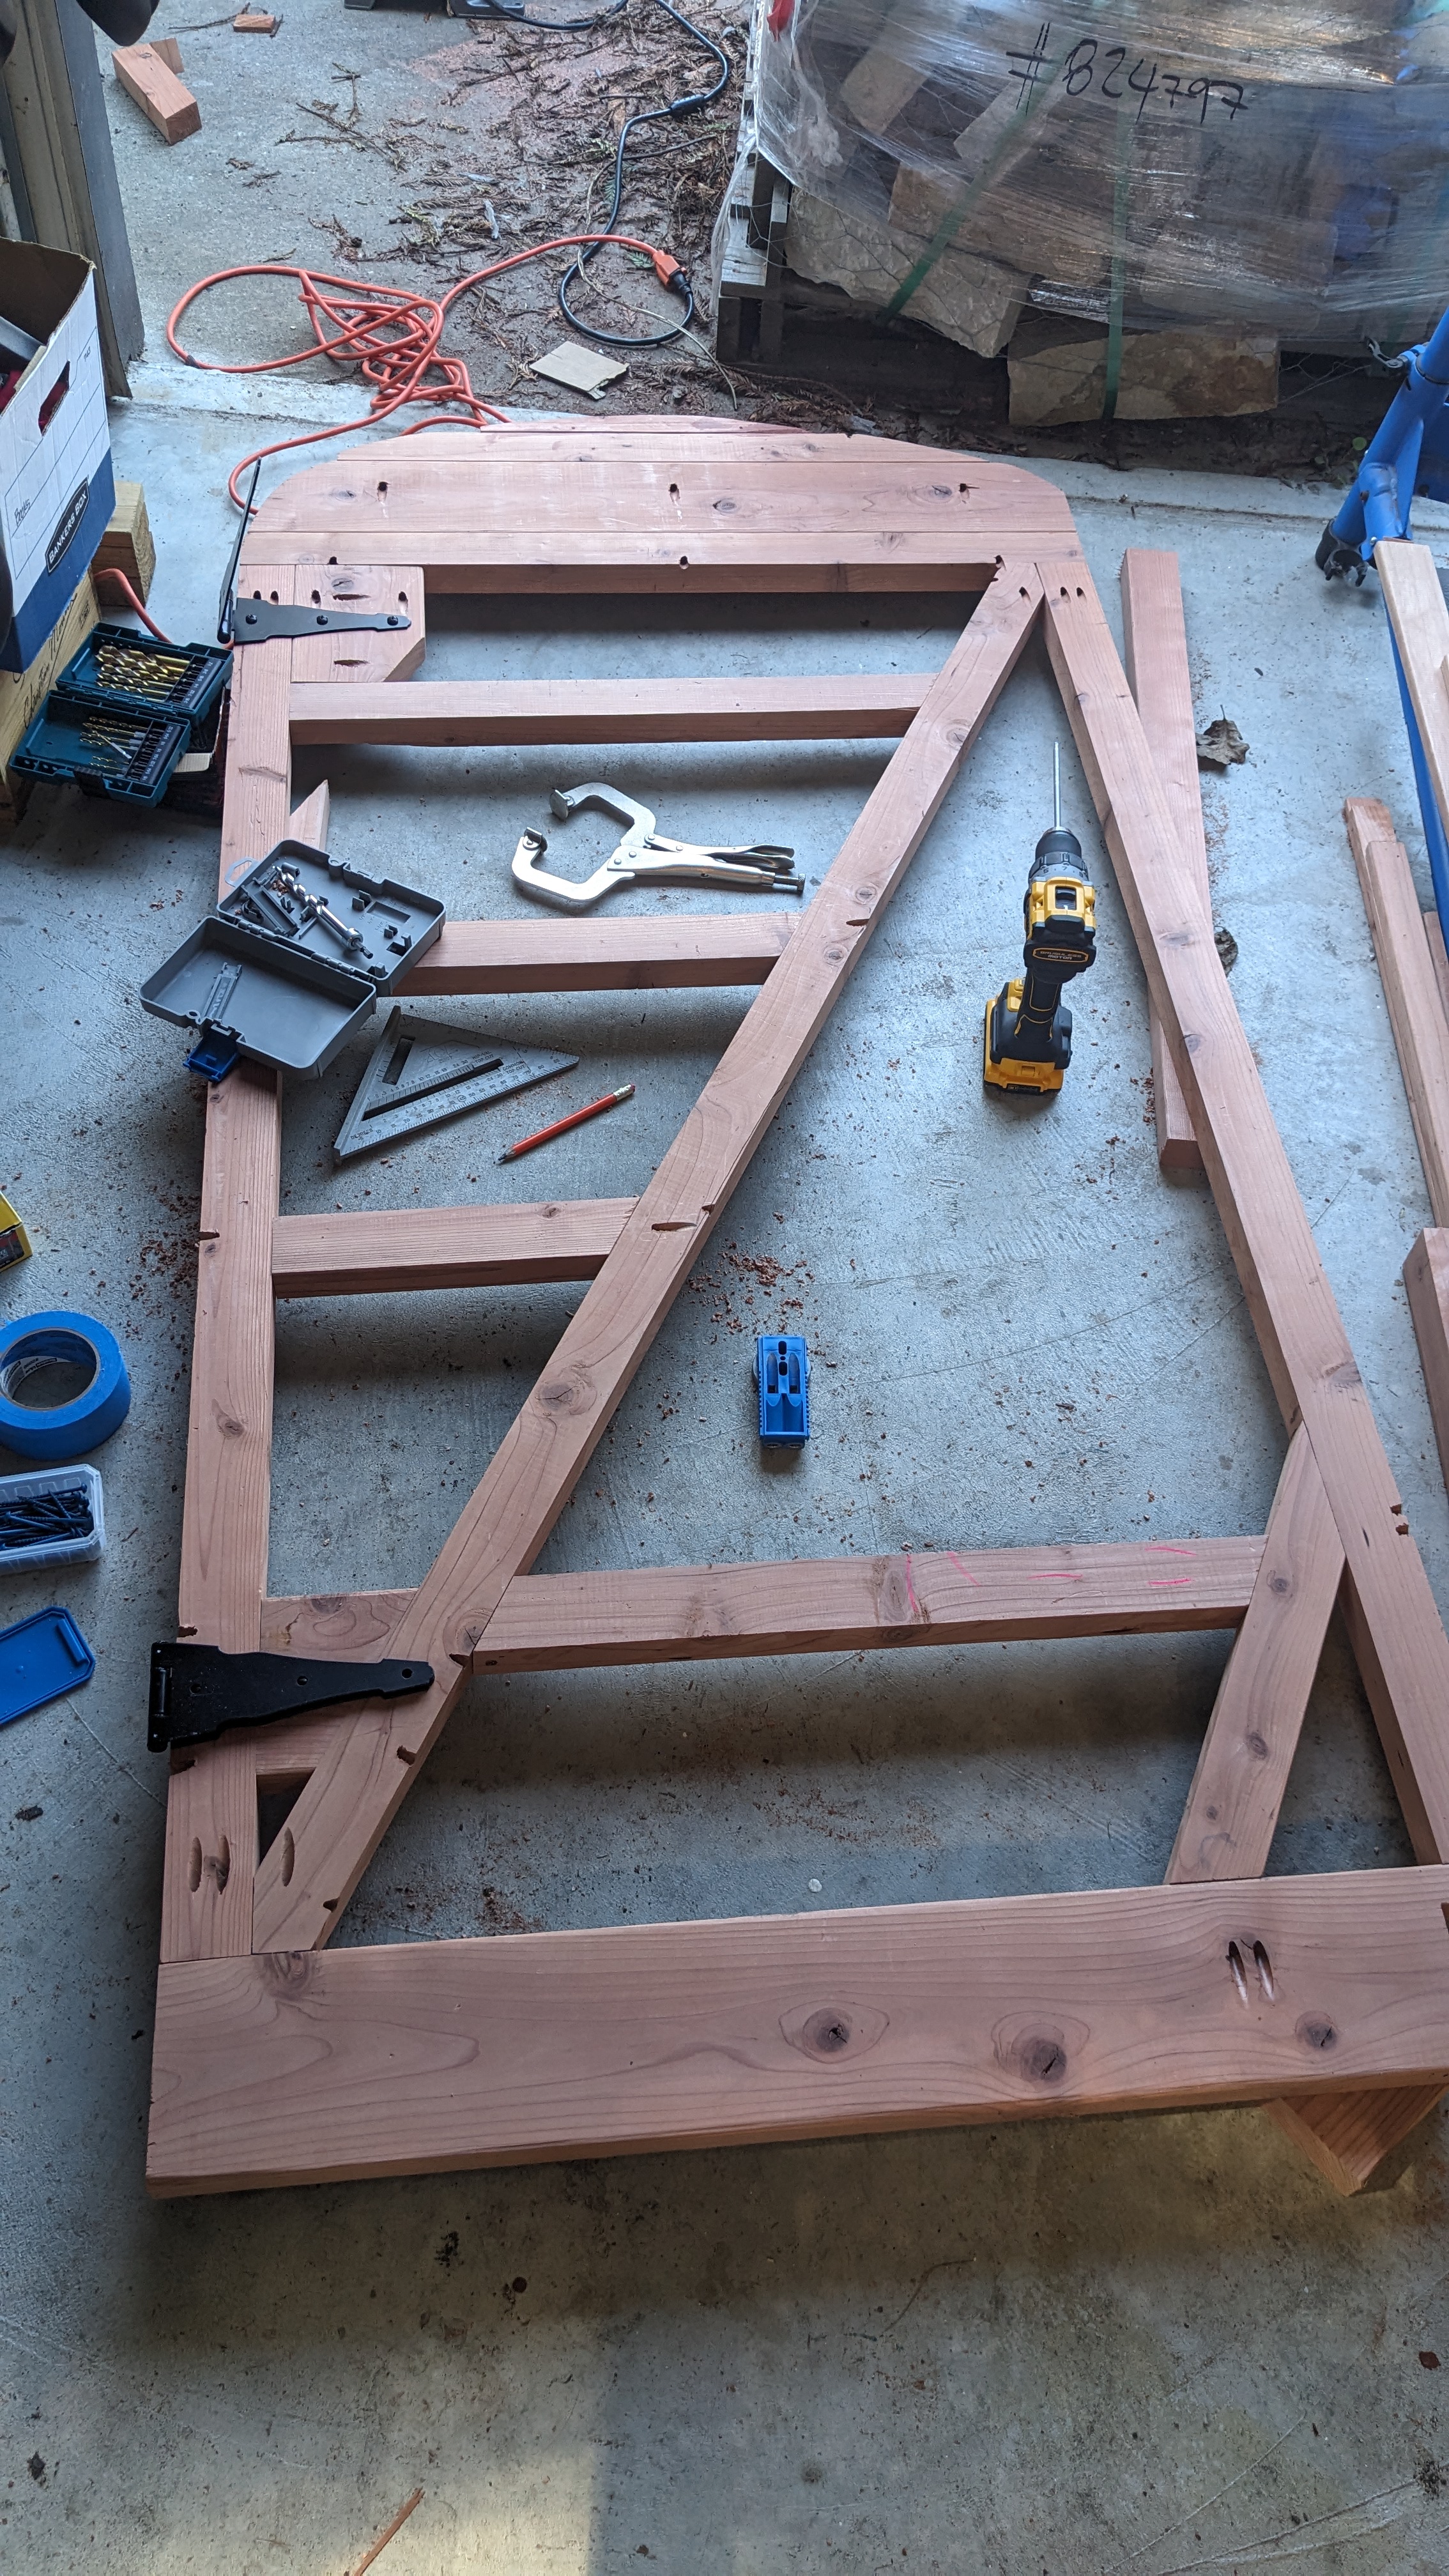
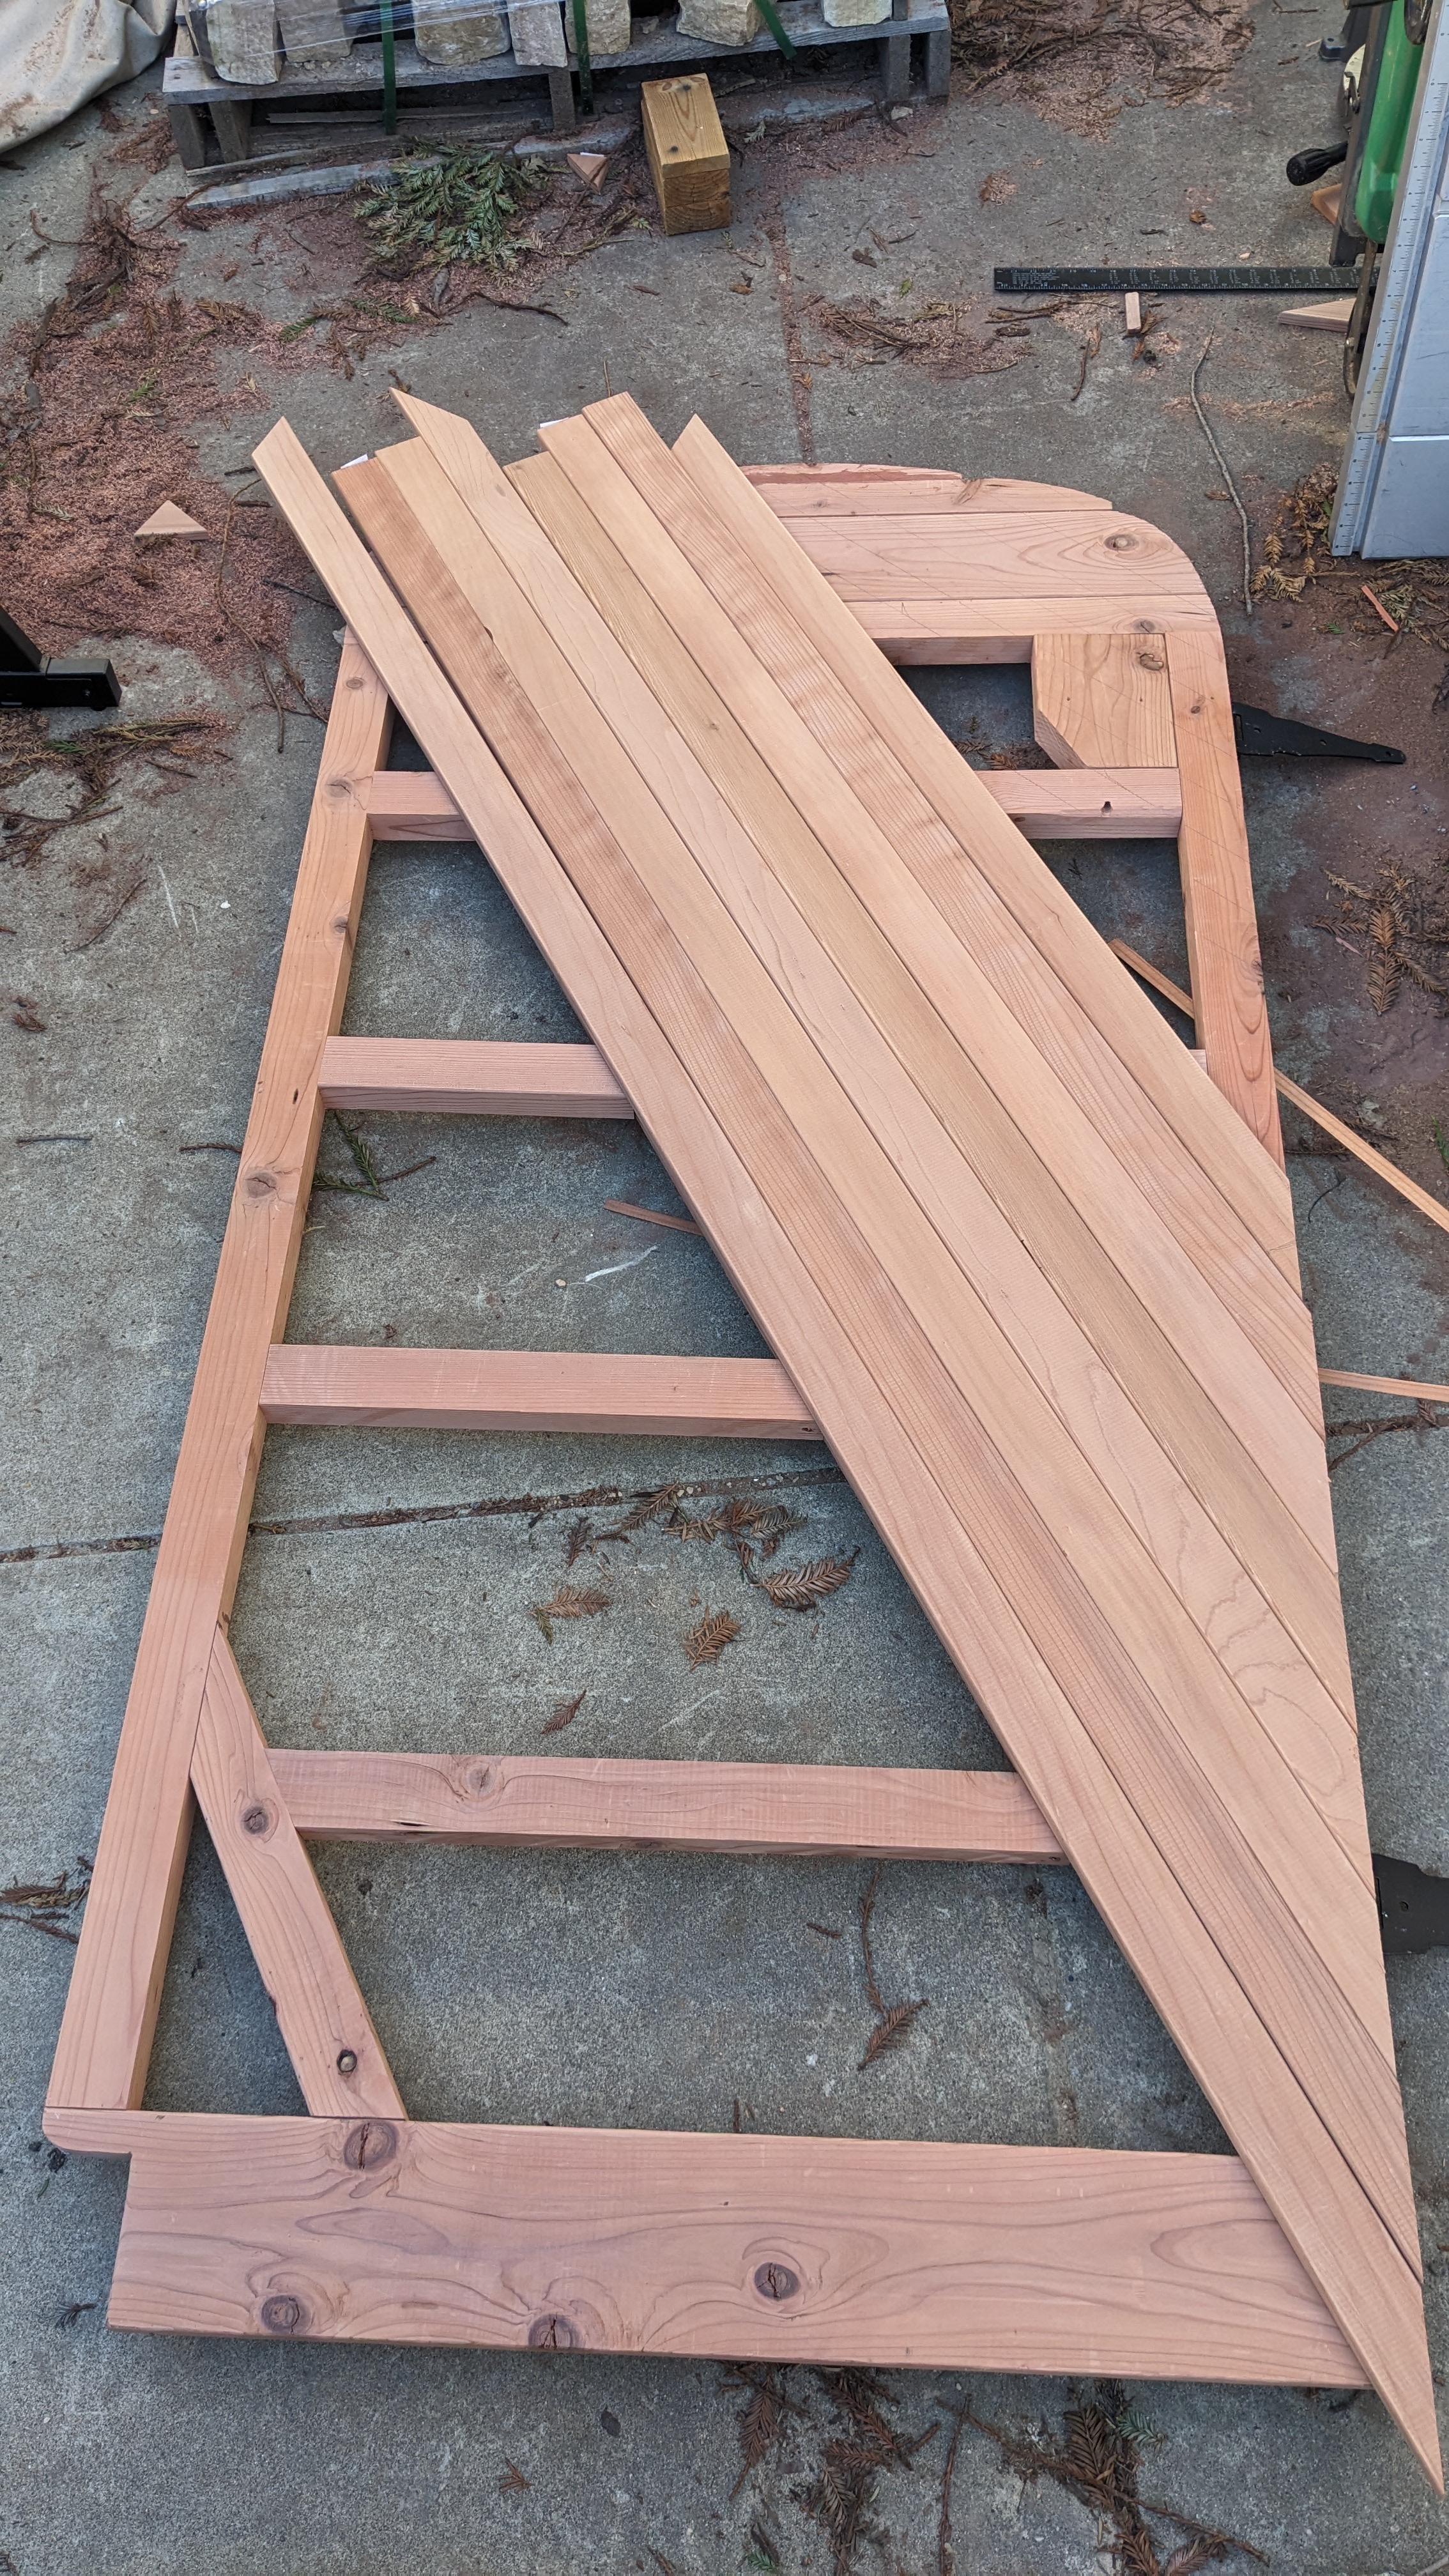
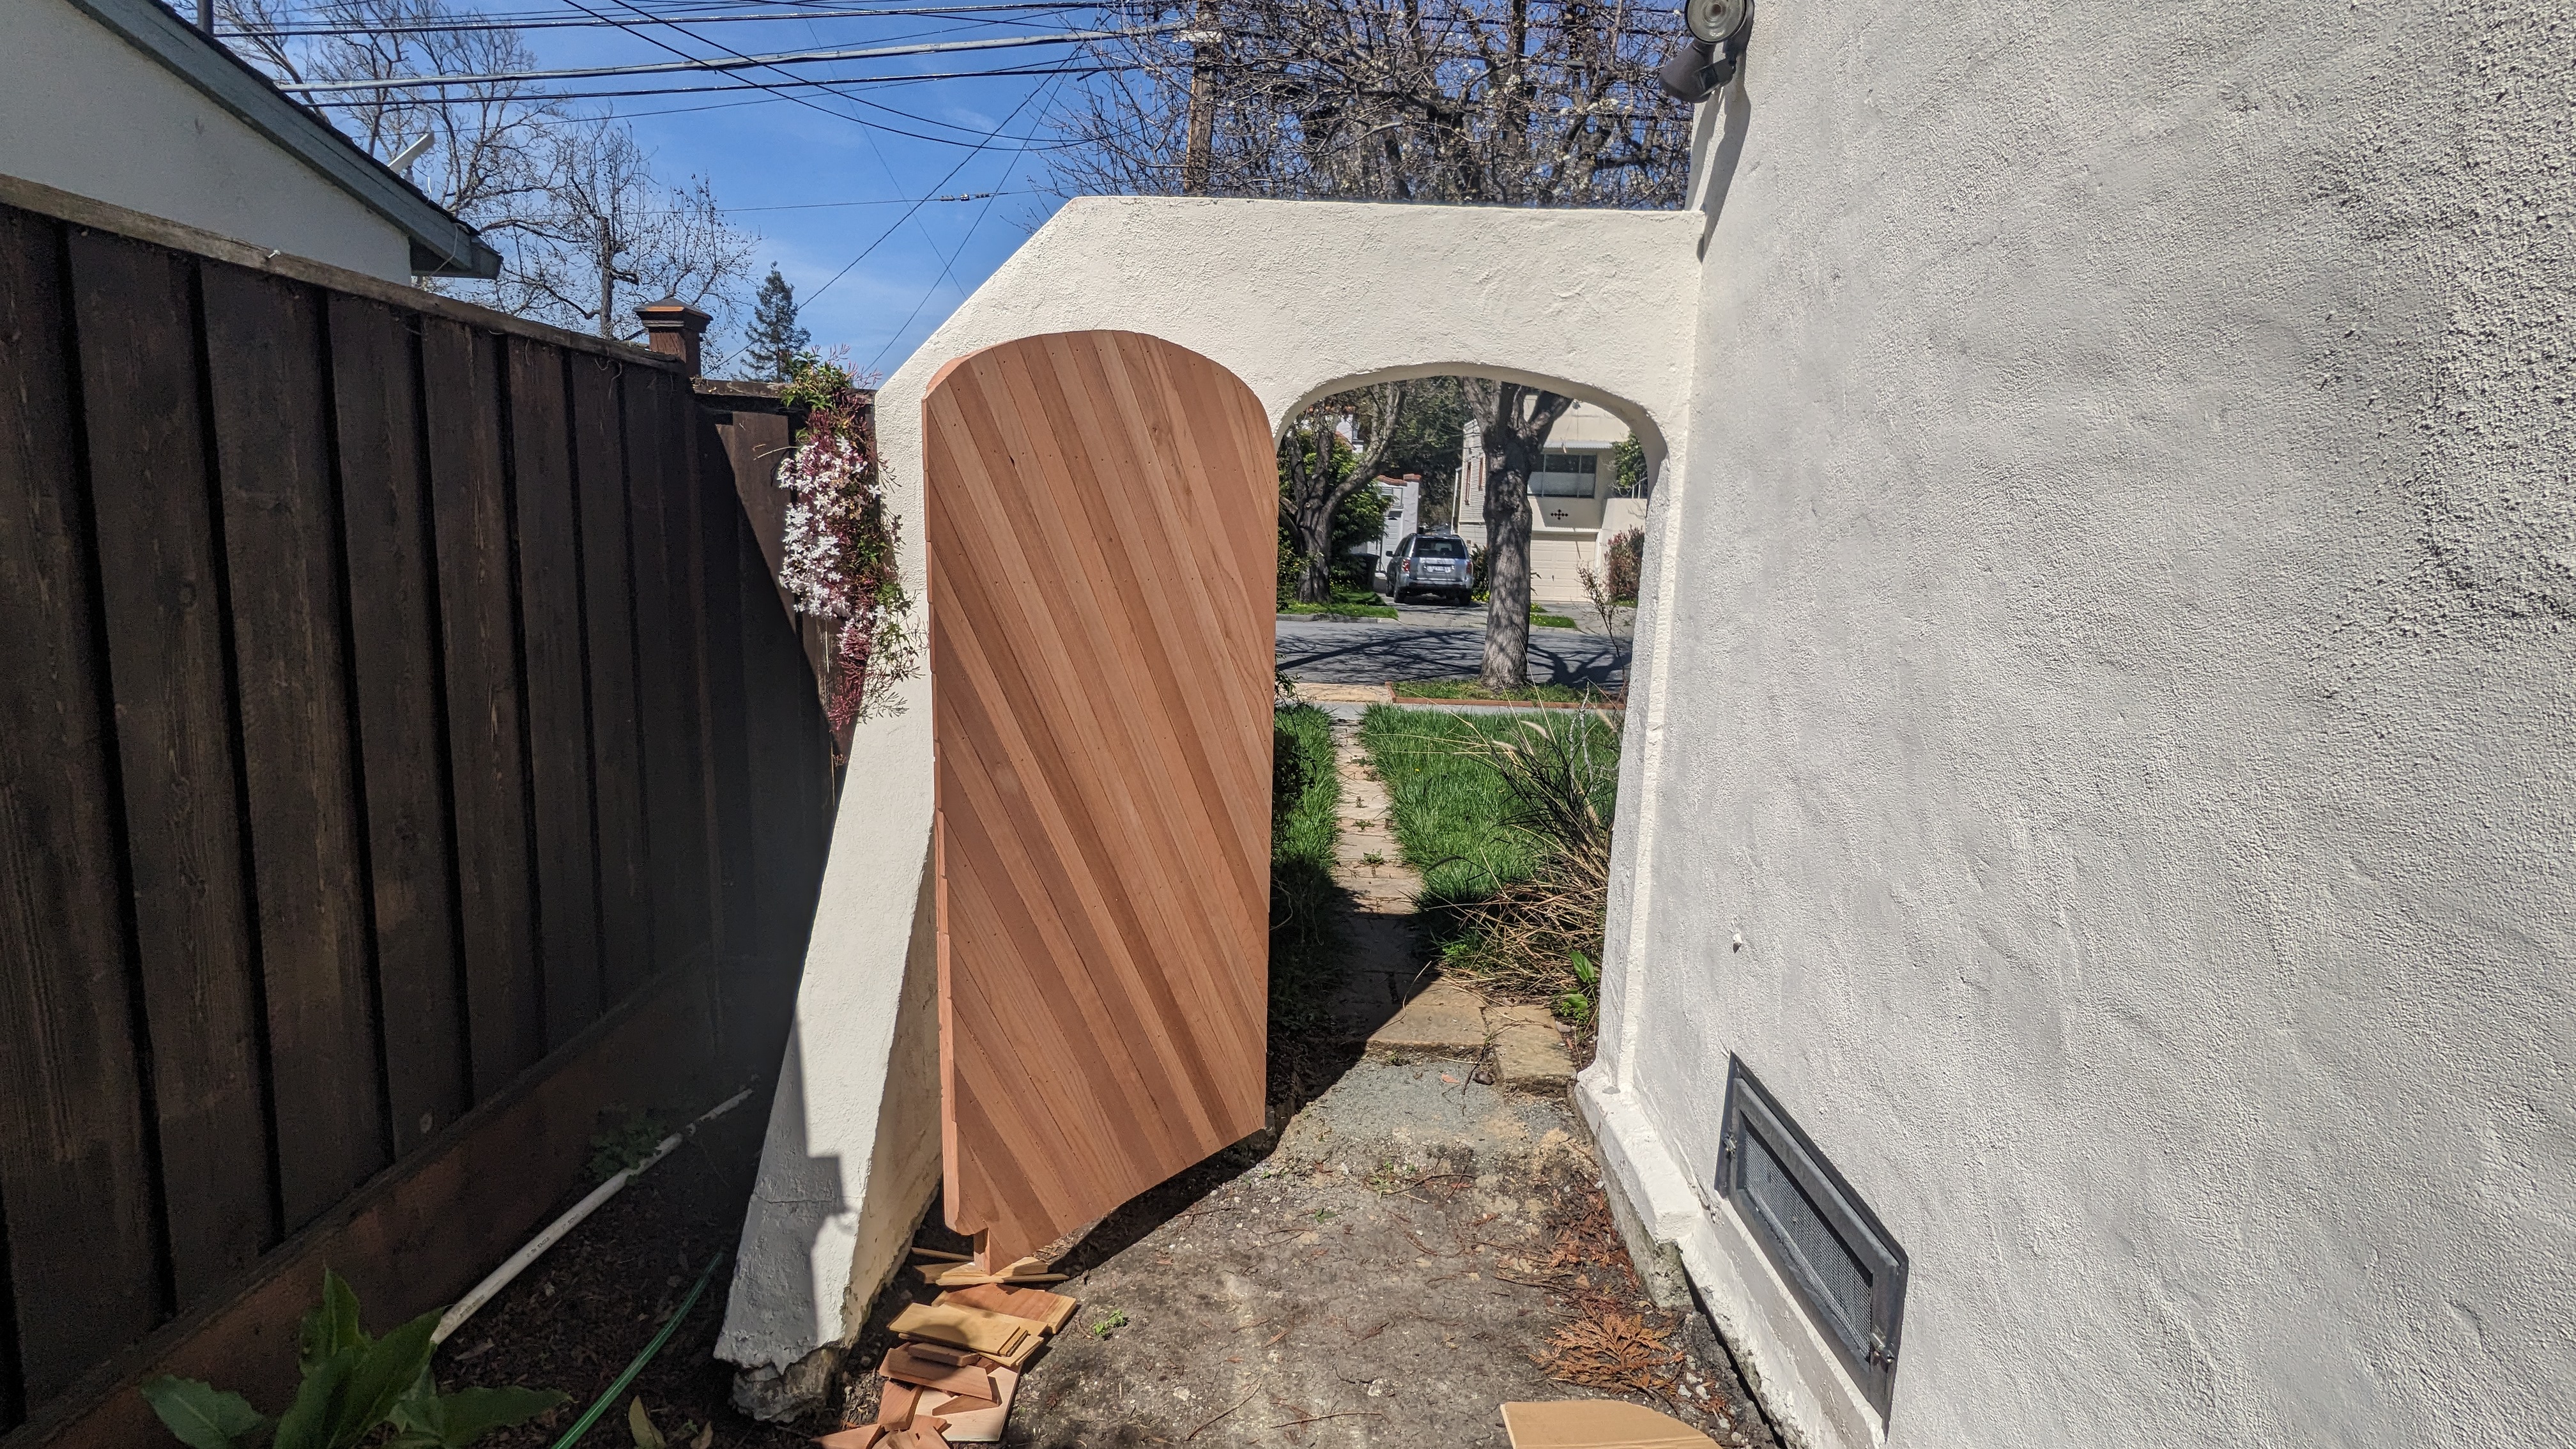
I ripped some nice redwood 2x6s in about half and used those lengths to build a frame. The frame has a funny notch in the bottom corner to route around the house's foundation. The stucco arch is not exactly plumb but I decided to make my door square, and I think that was the right call. At the start of this I make a cardboard template of the irregular stucco arch but I never ended up using it.
Friction everywhere! I had to keep sanding or outright sawing off material for a better fit. I added bracing. The frame was done mostly with pocket-screws btw. The arch came together via much test-fitting, tracing and local jigsawing.
I started adding even more interior pieces to support the planned cladding. I attached the hinges to the frame only. This was me getting ahead of myself, I think it would have been easier to leave the hinges off til the end. Around this point I also realized I was thinking about the cosmetics wrong -- I had been putting the nice-looking sides of the frame towards the street, but I should have faced them inwards since the street-side would have cladding. So the interior could have looked a bit nicer, ah well.
But I was happy with how this came out.


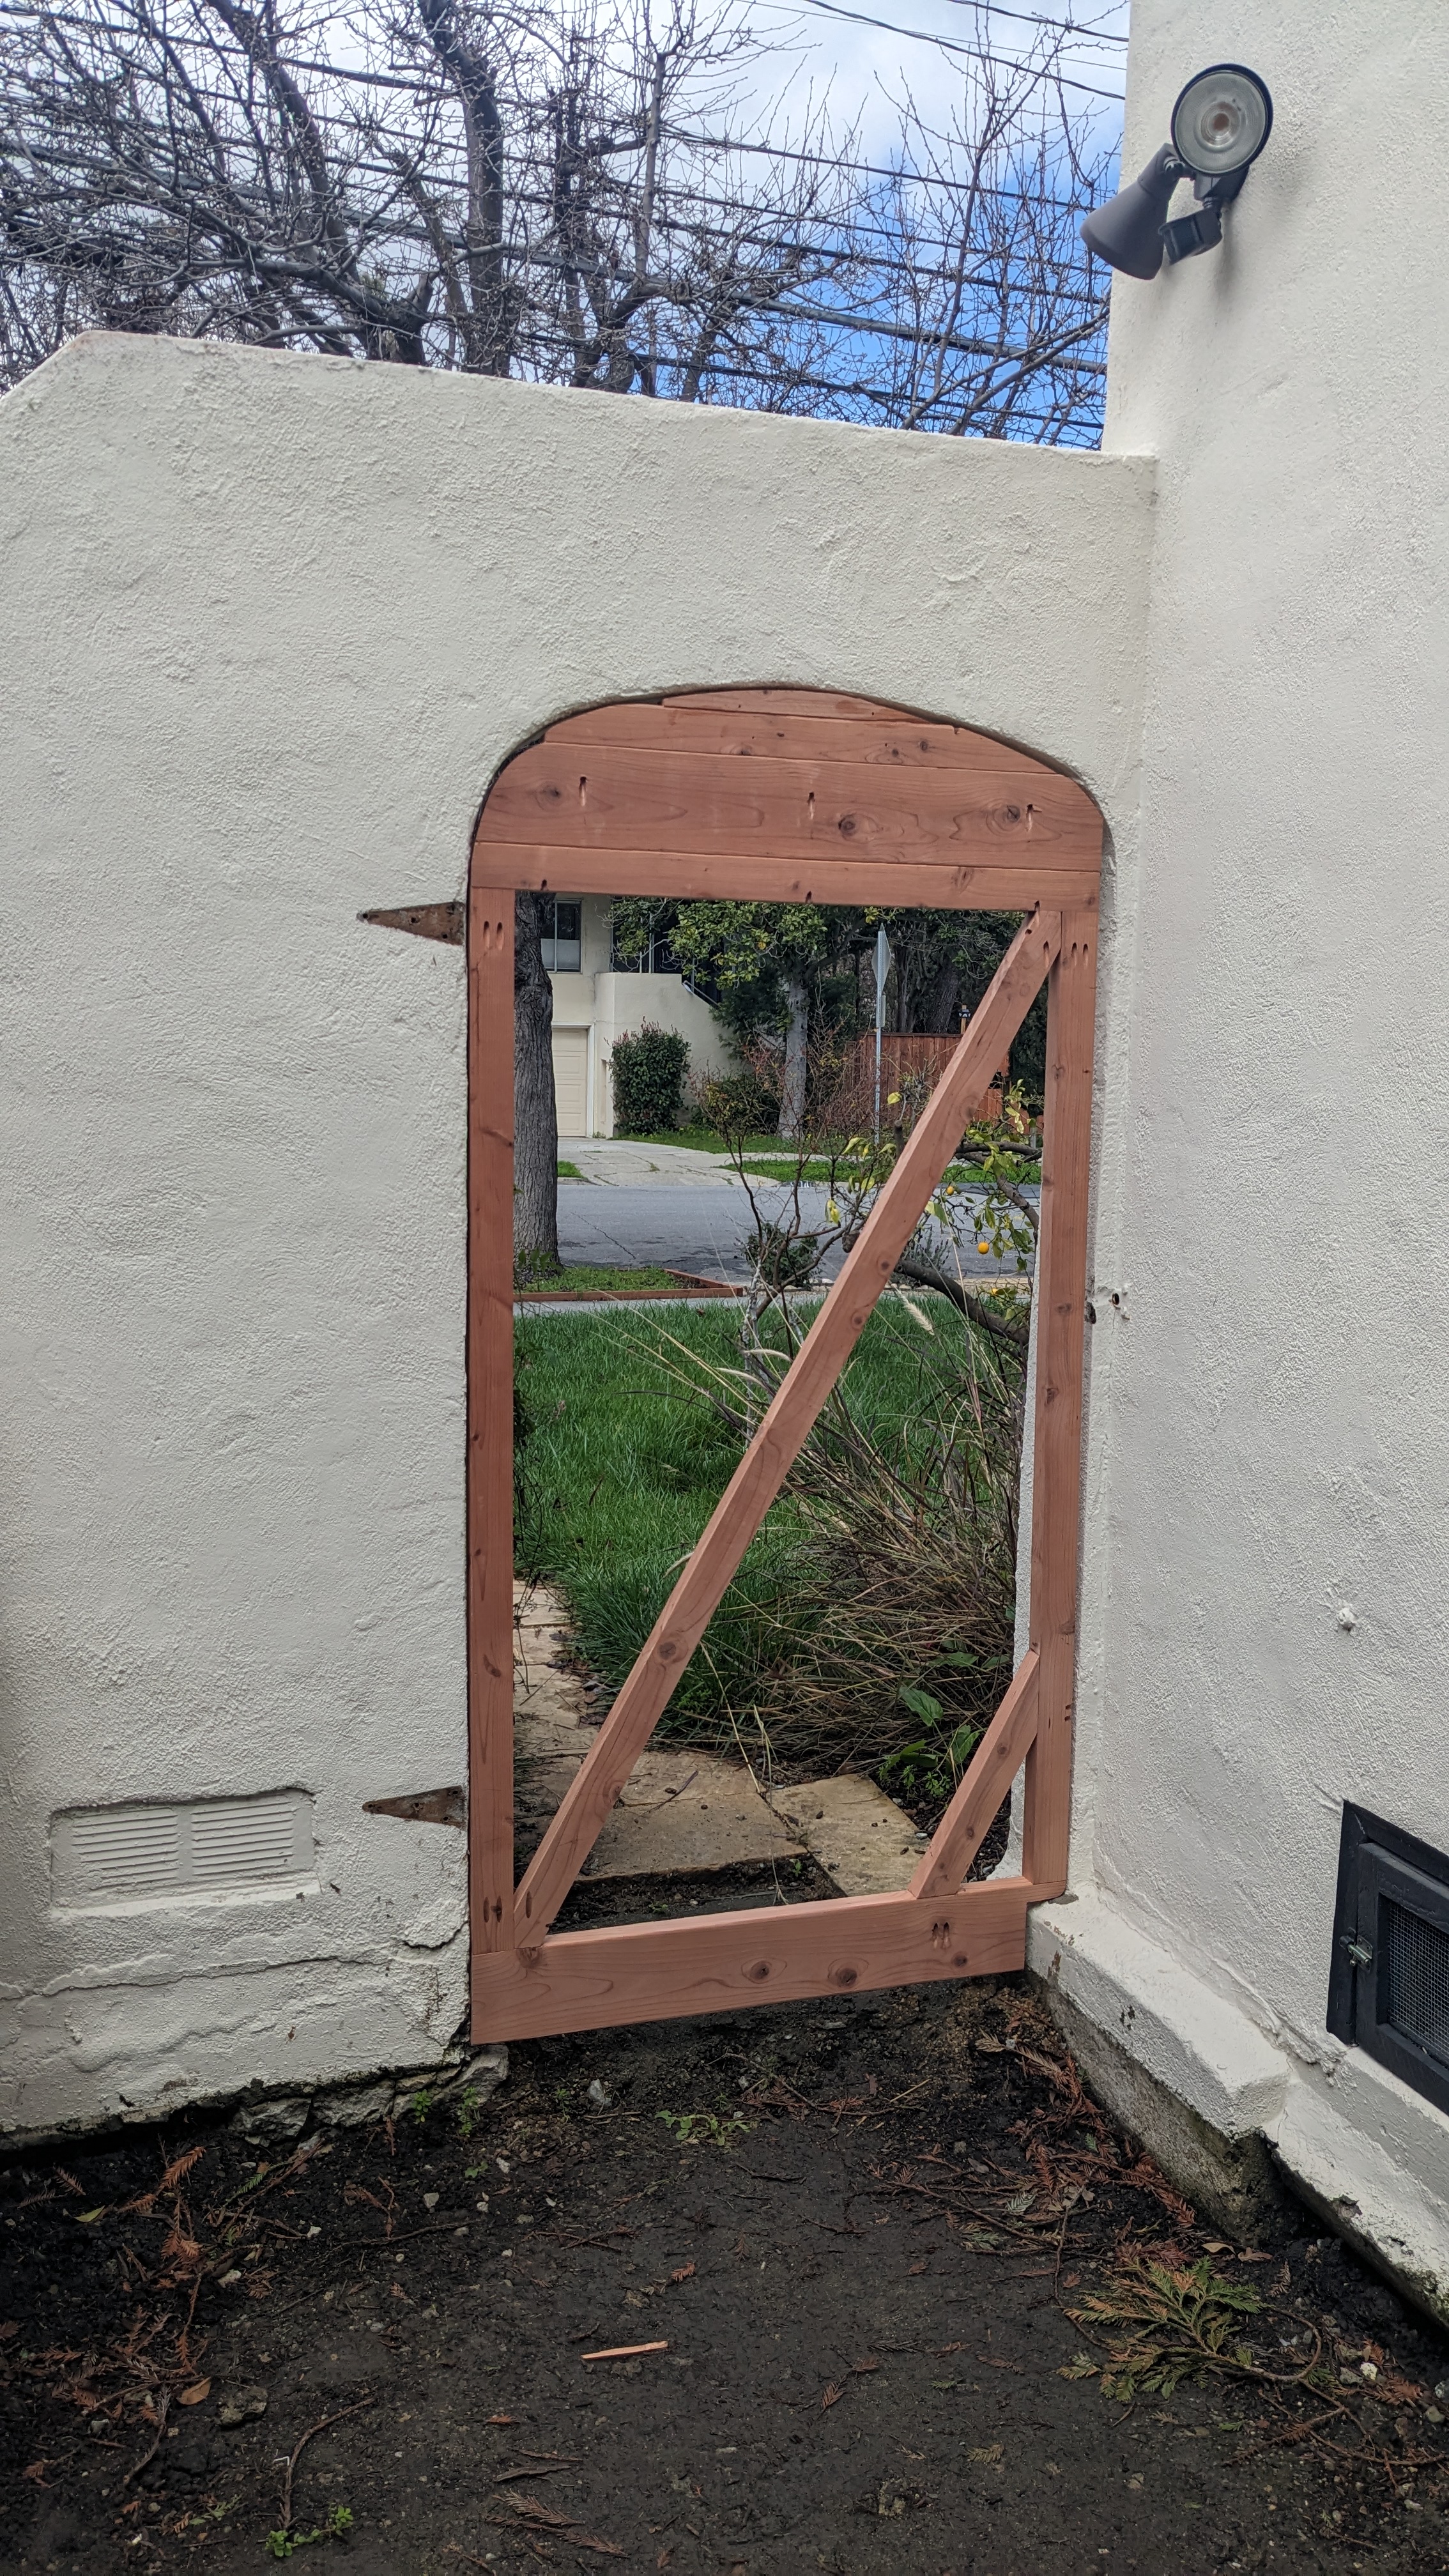
Cladding and Stain
For the cladding I used B-grade Redwood, I think 1xs or maybe 5/4s. I did a test run where I tried ripping a bit off the cladding to get a square edge, but I'm not steady enough with my saw so the edge wasn't much better than the factory one. I did end up using these slightly narrower test pieces alongside the original ones, but it's hard to spot. I thought about running the slats to match the ~45deg angle of the stucco wall but I didn't have enough wood. There was a good-sized gap between the frame and wall, and quite the difference top to bottom.. I decided to make this up with the cladding.
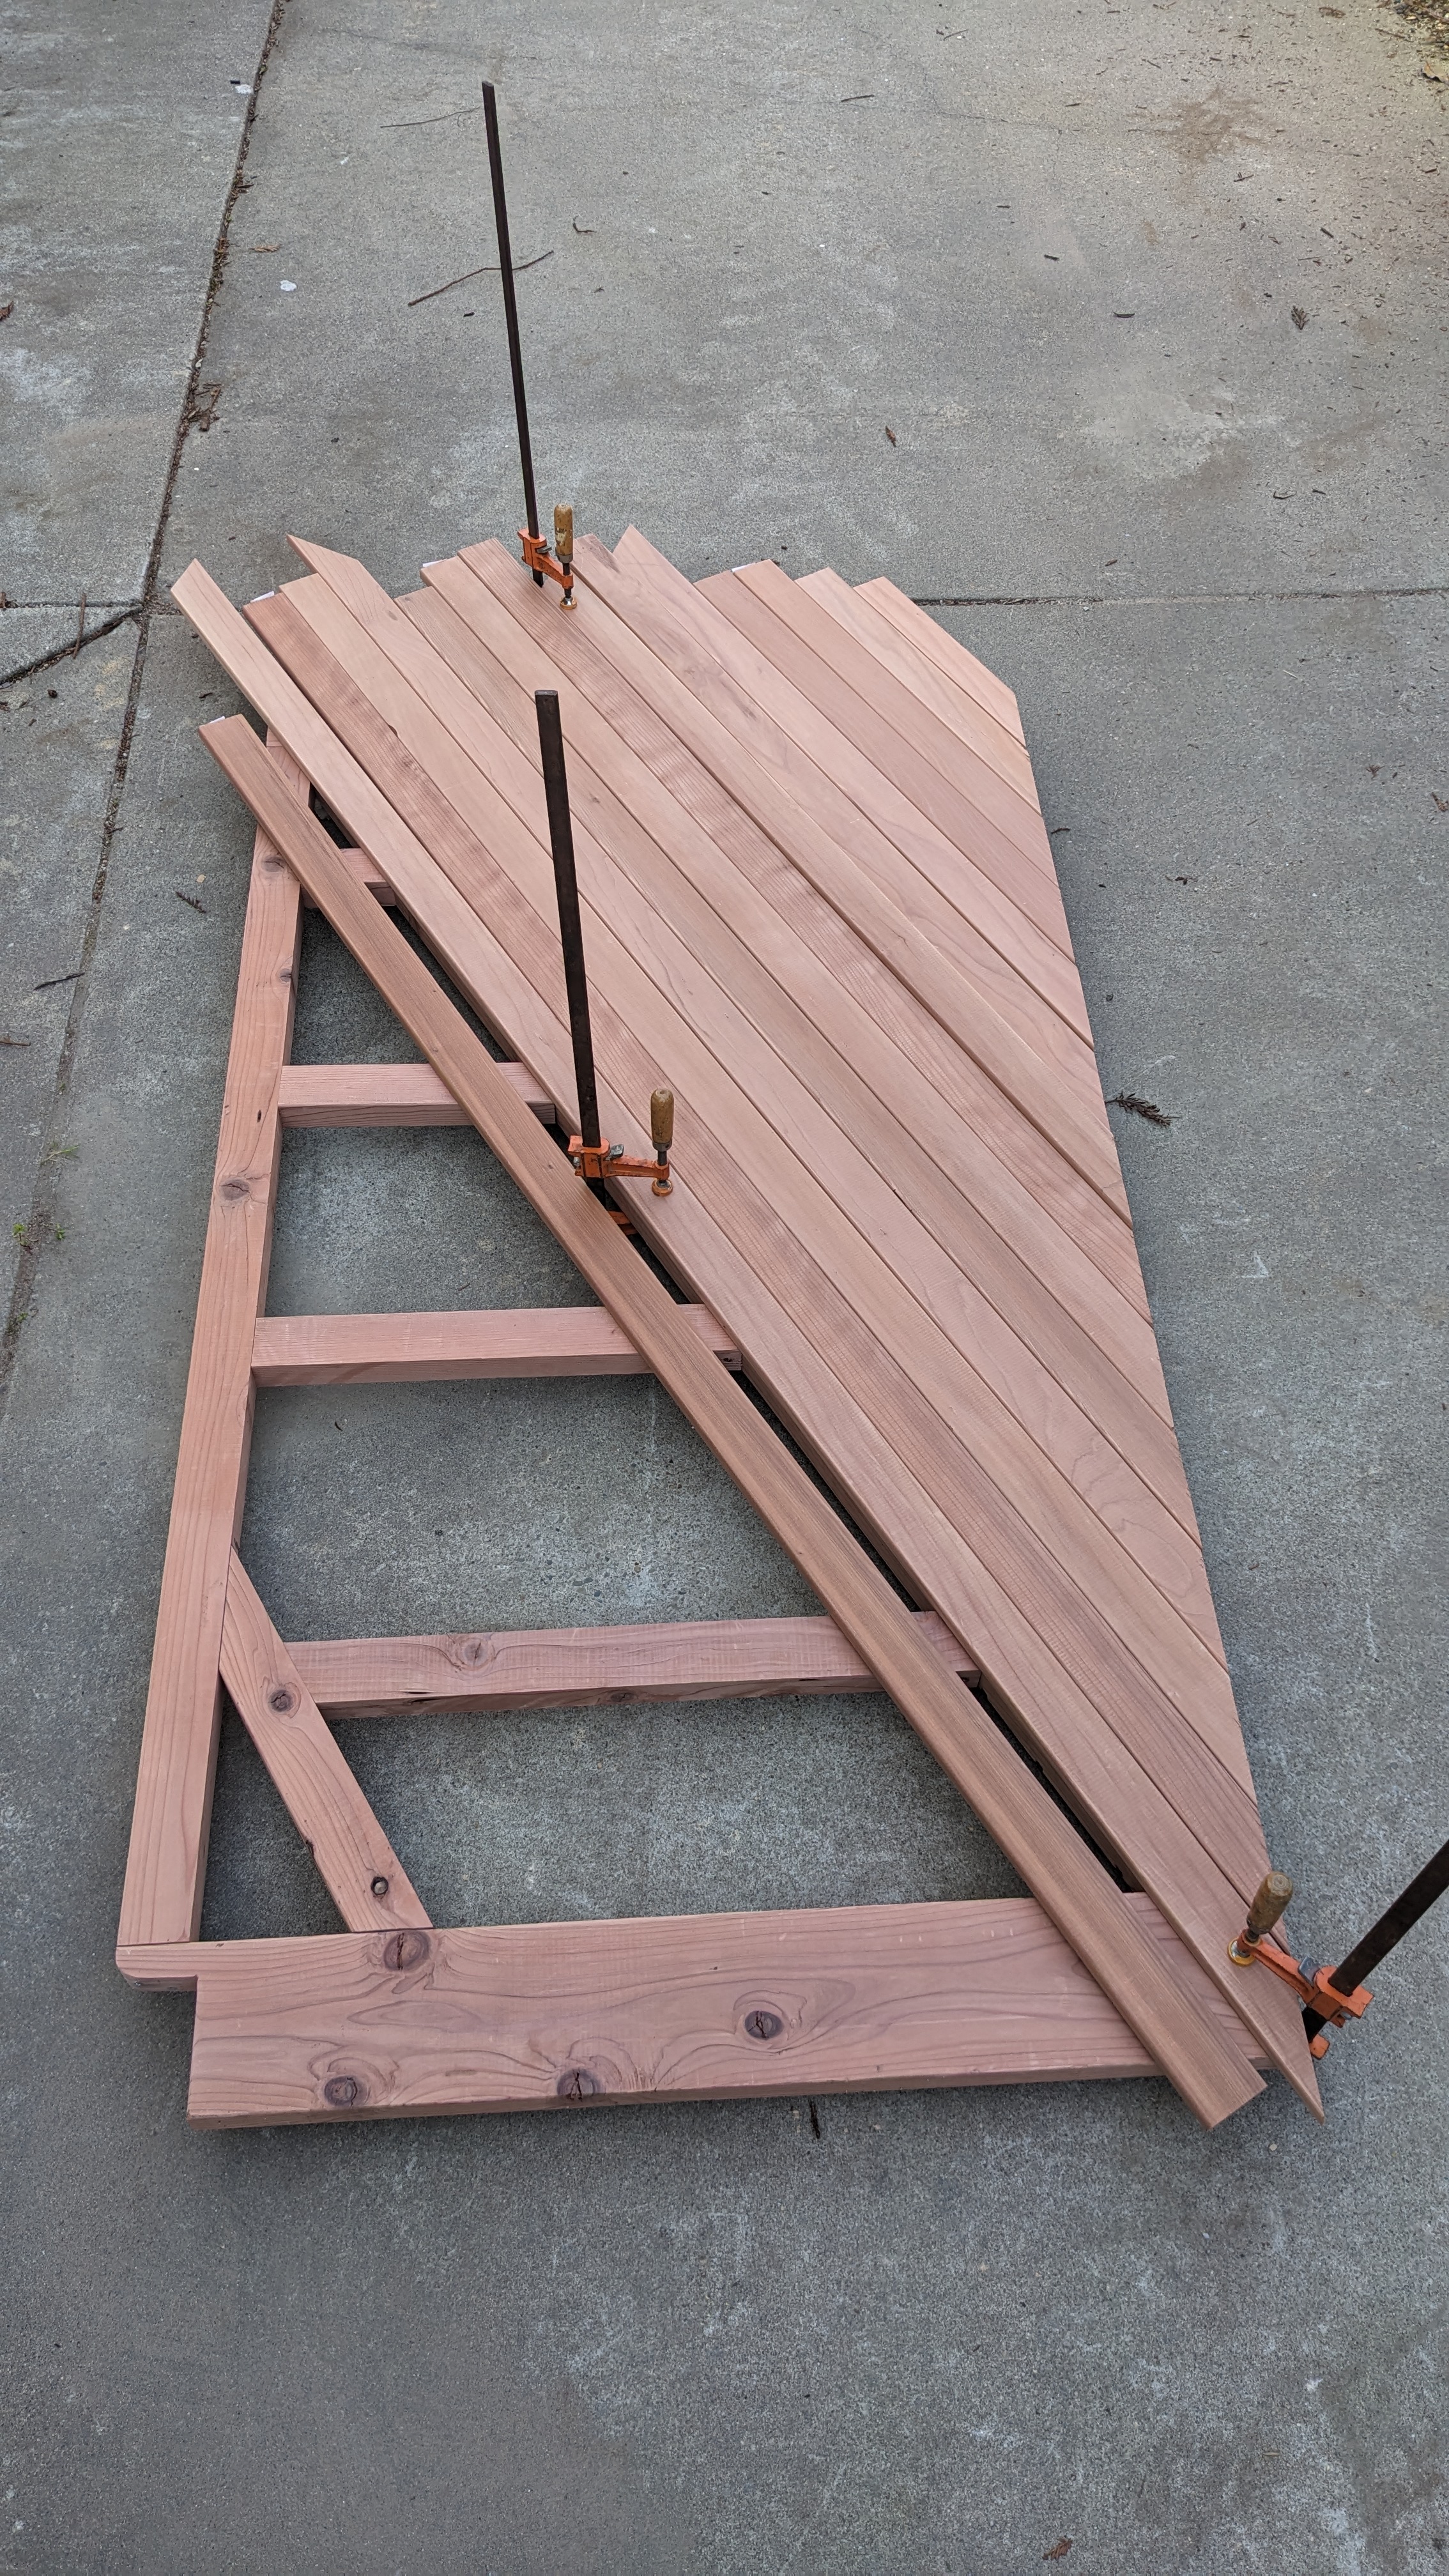
So I started in the middle and just dry-fit things, leaving one side long. Clamps to keep things aligned.. The dogs were puzzled and probably wanted to herd me back inside..
Then I got to the trim screws. I was trying to be extra careful so I pre-drilled them all. I used a couple of jigs just to set the point of an awl and keep the screwheads evenly spaced. I don't remember how I set the distances for the trim screws in the curved portion.. Top left and bottom right cladding pieces were too small for screws following the pattern, so those ones are glued in place. Then I cut it all flush to the underlying frame with a jigsaw, I think it came out great!
I made a few small mistakes: twice dropping tools onto the soft wood.. but this gate will probably get pretty beat up in normal operation over the years. I also zoned out and added an extra screw somewhere, breaking up the pattern a bit, alas.
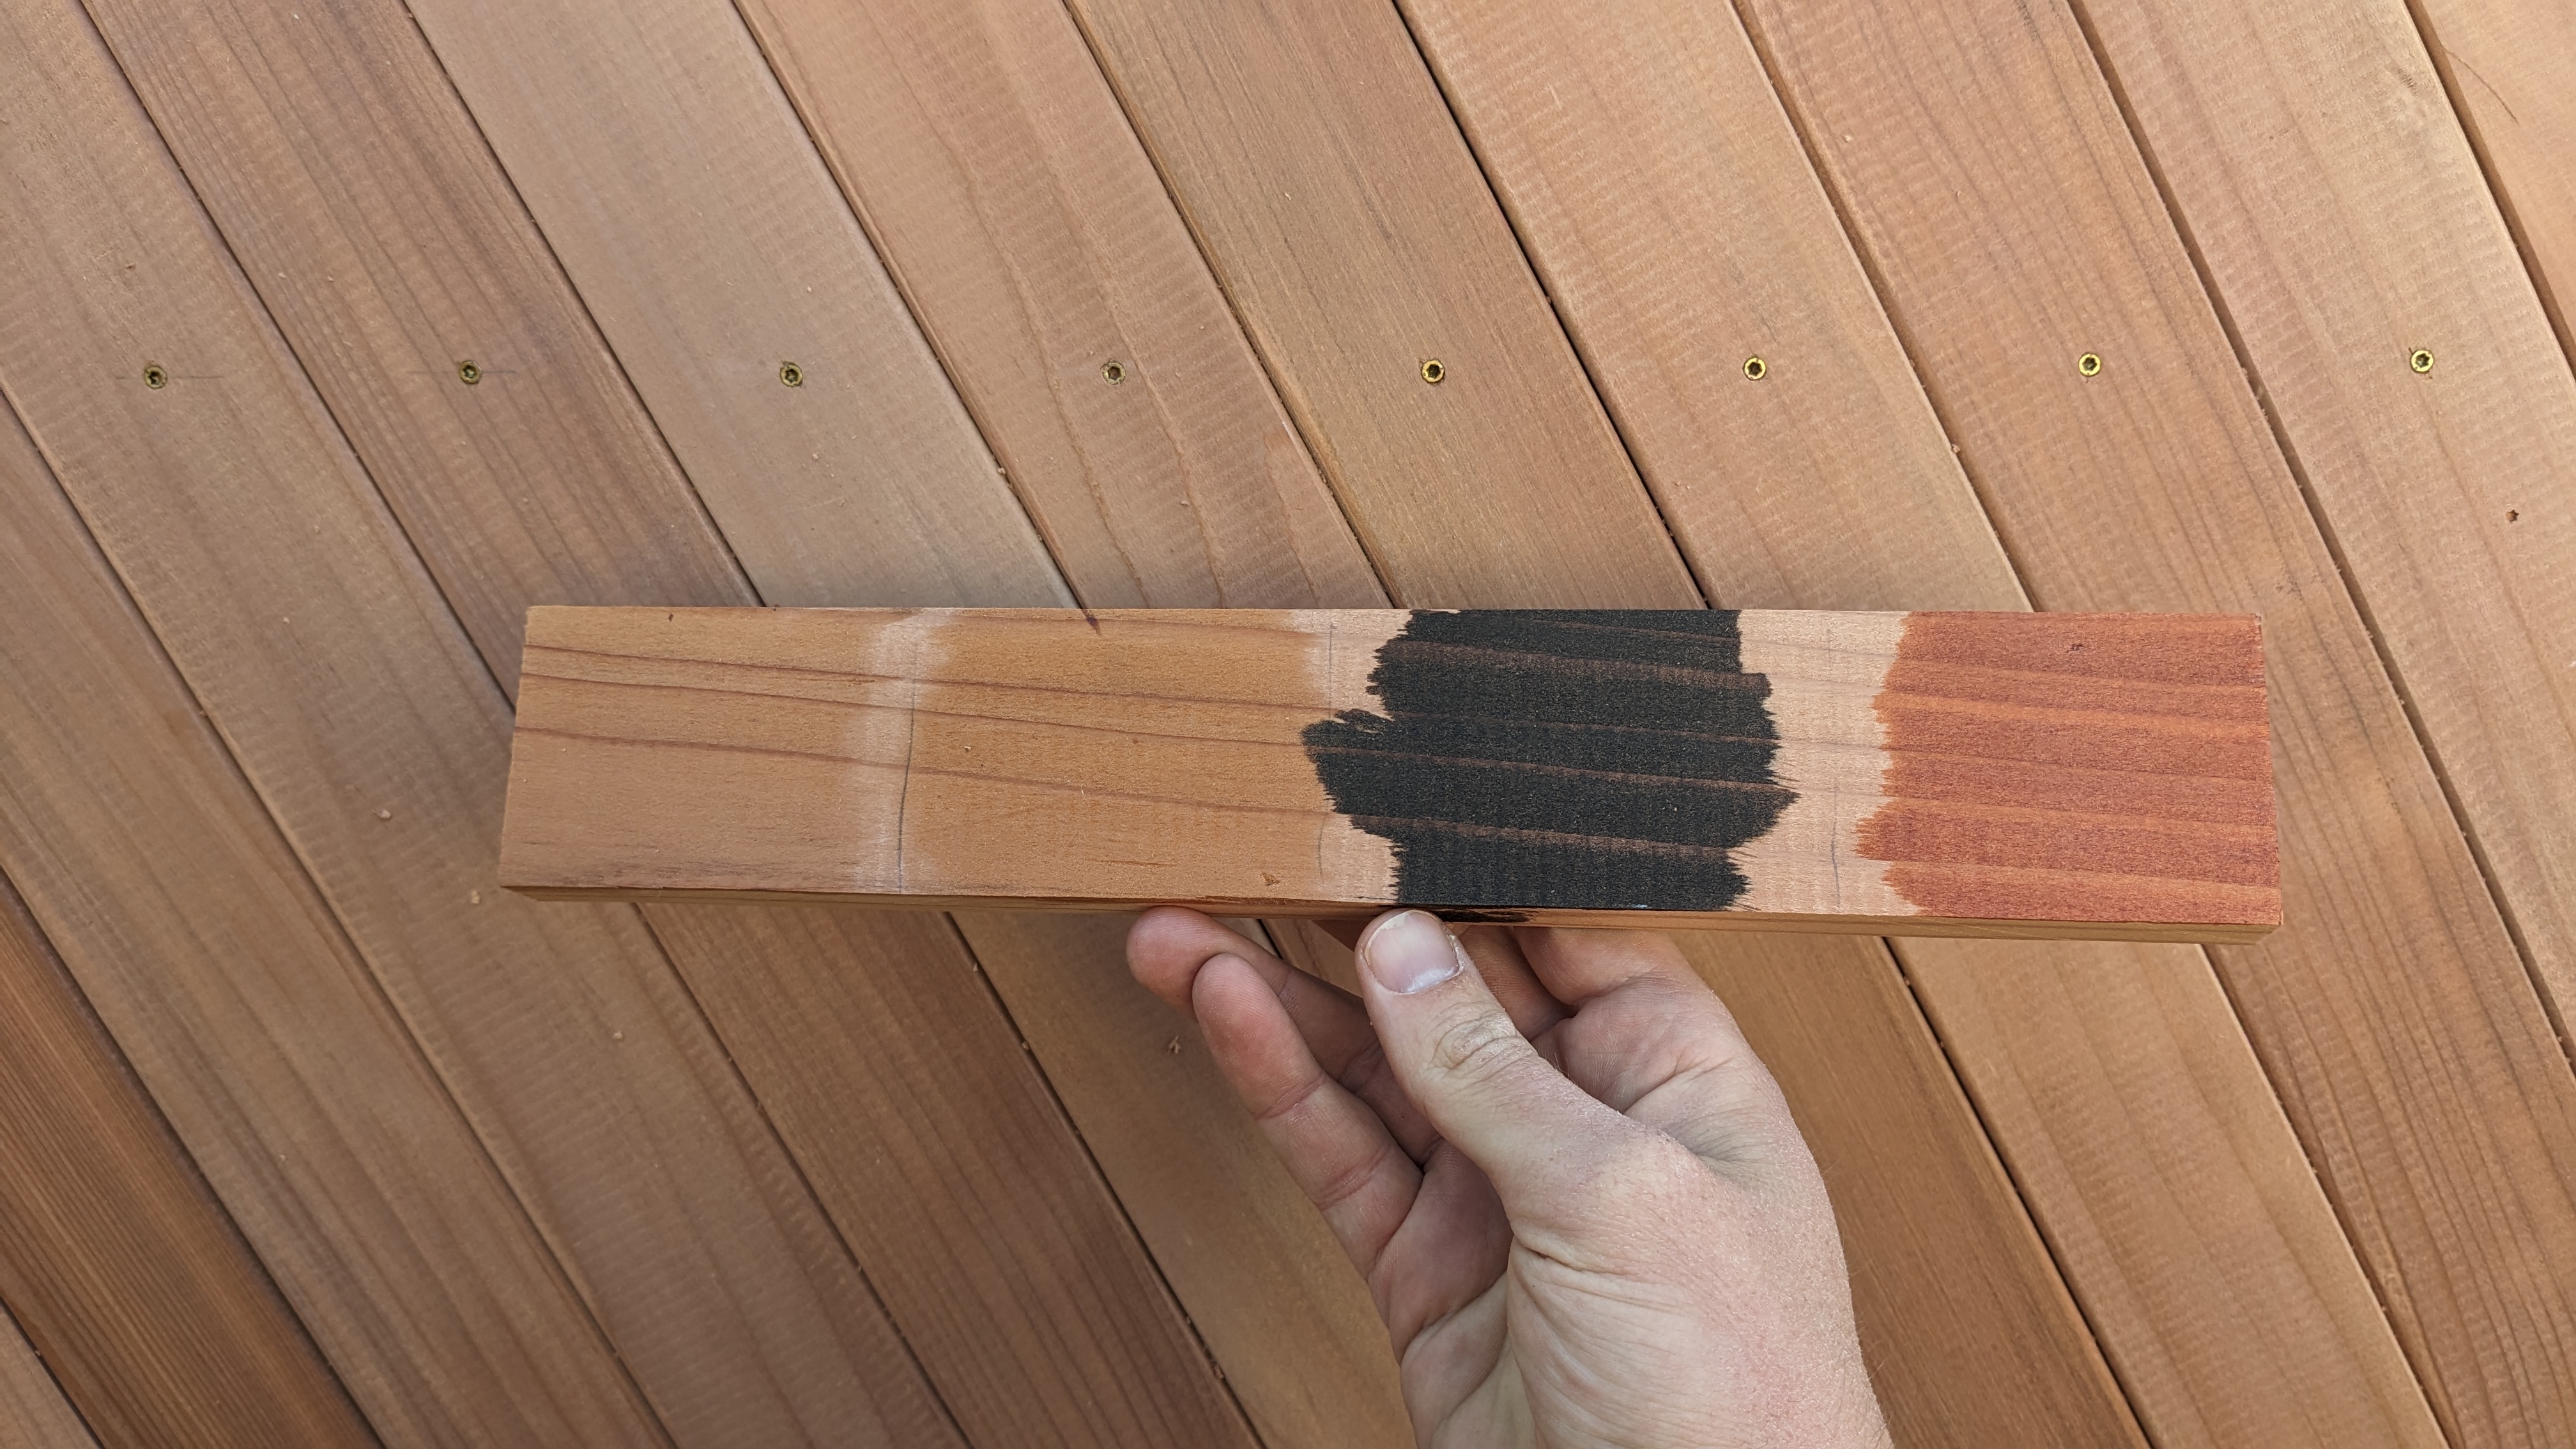
Then it was time to stain. I erased many many pencil marks.. We looked at a few options but chose #2 in this lineup, a mostly clear stain. My neighbor came over, told me it was about to rain, and I rapidly applied one coat..


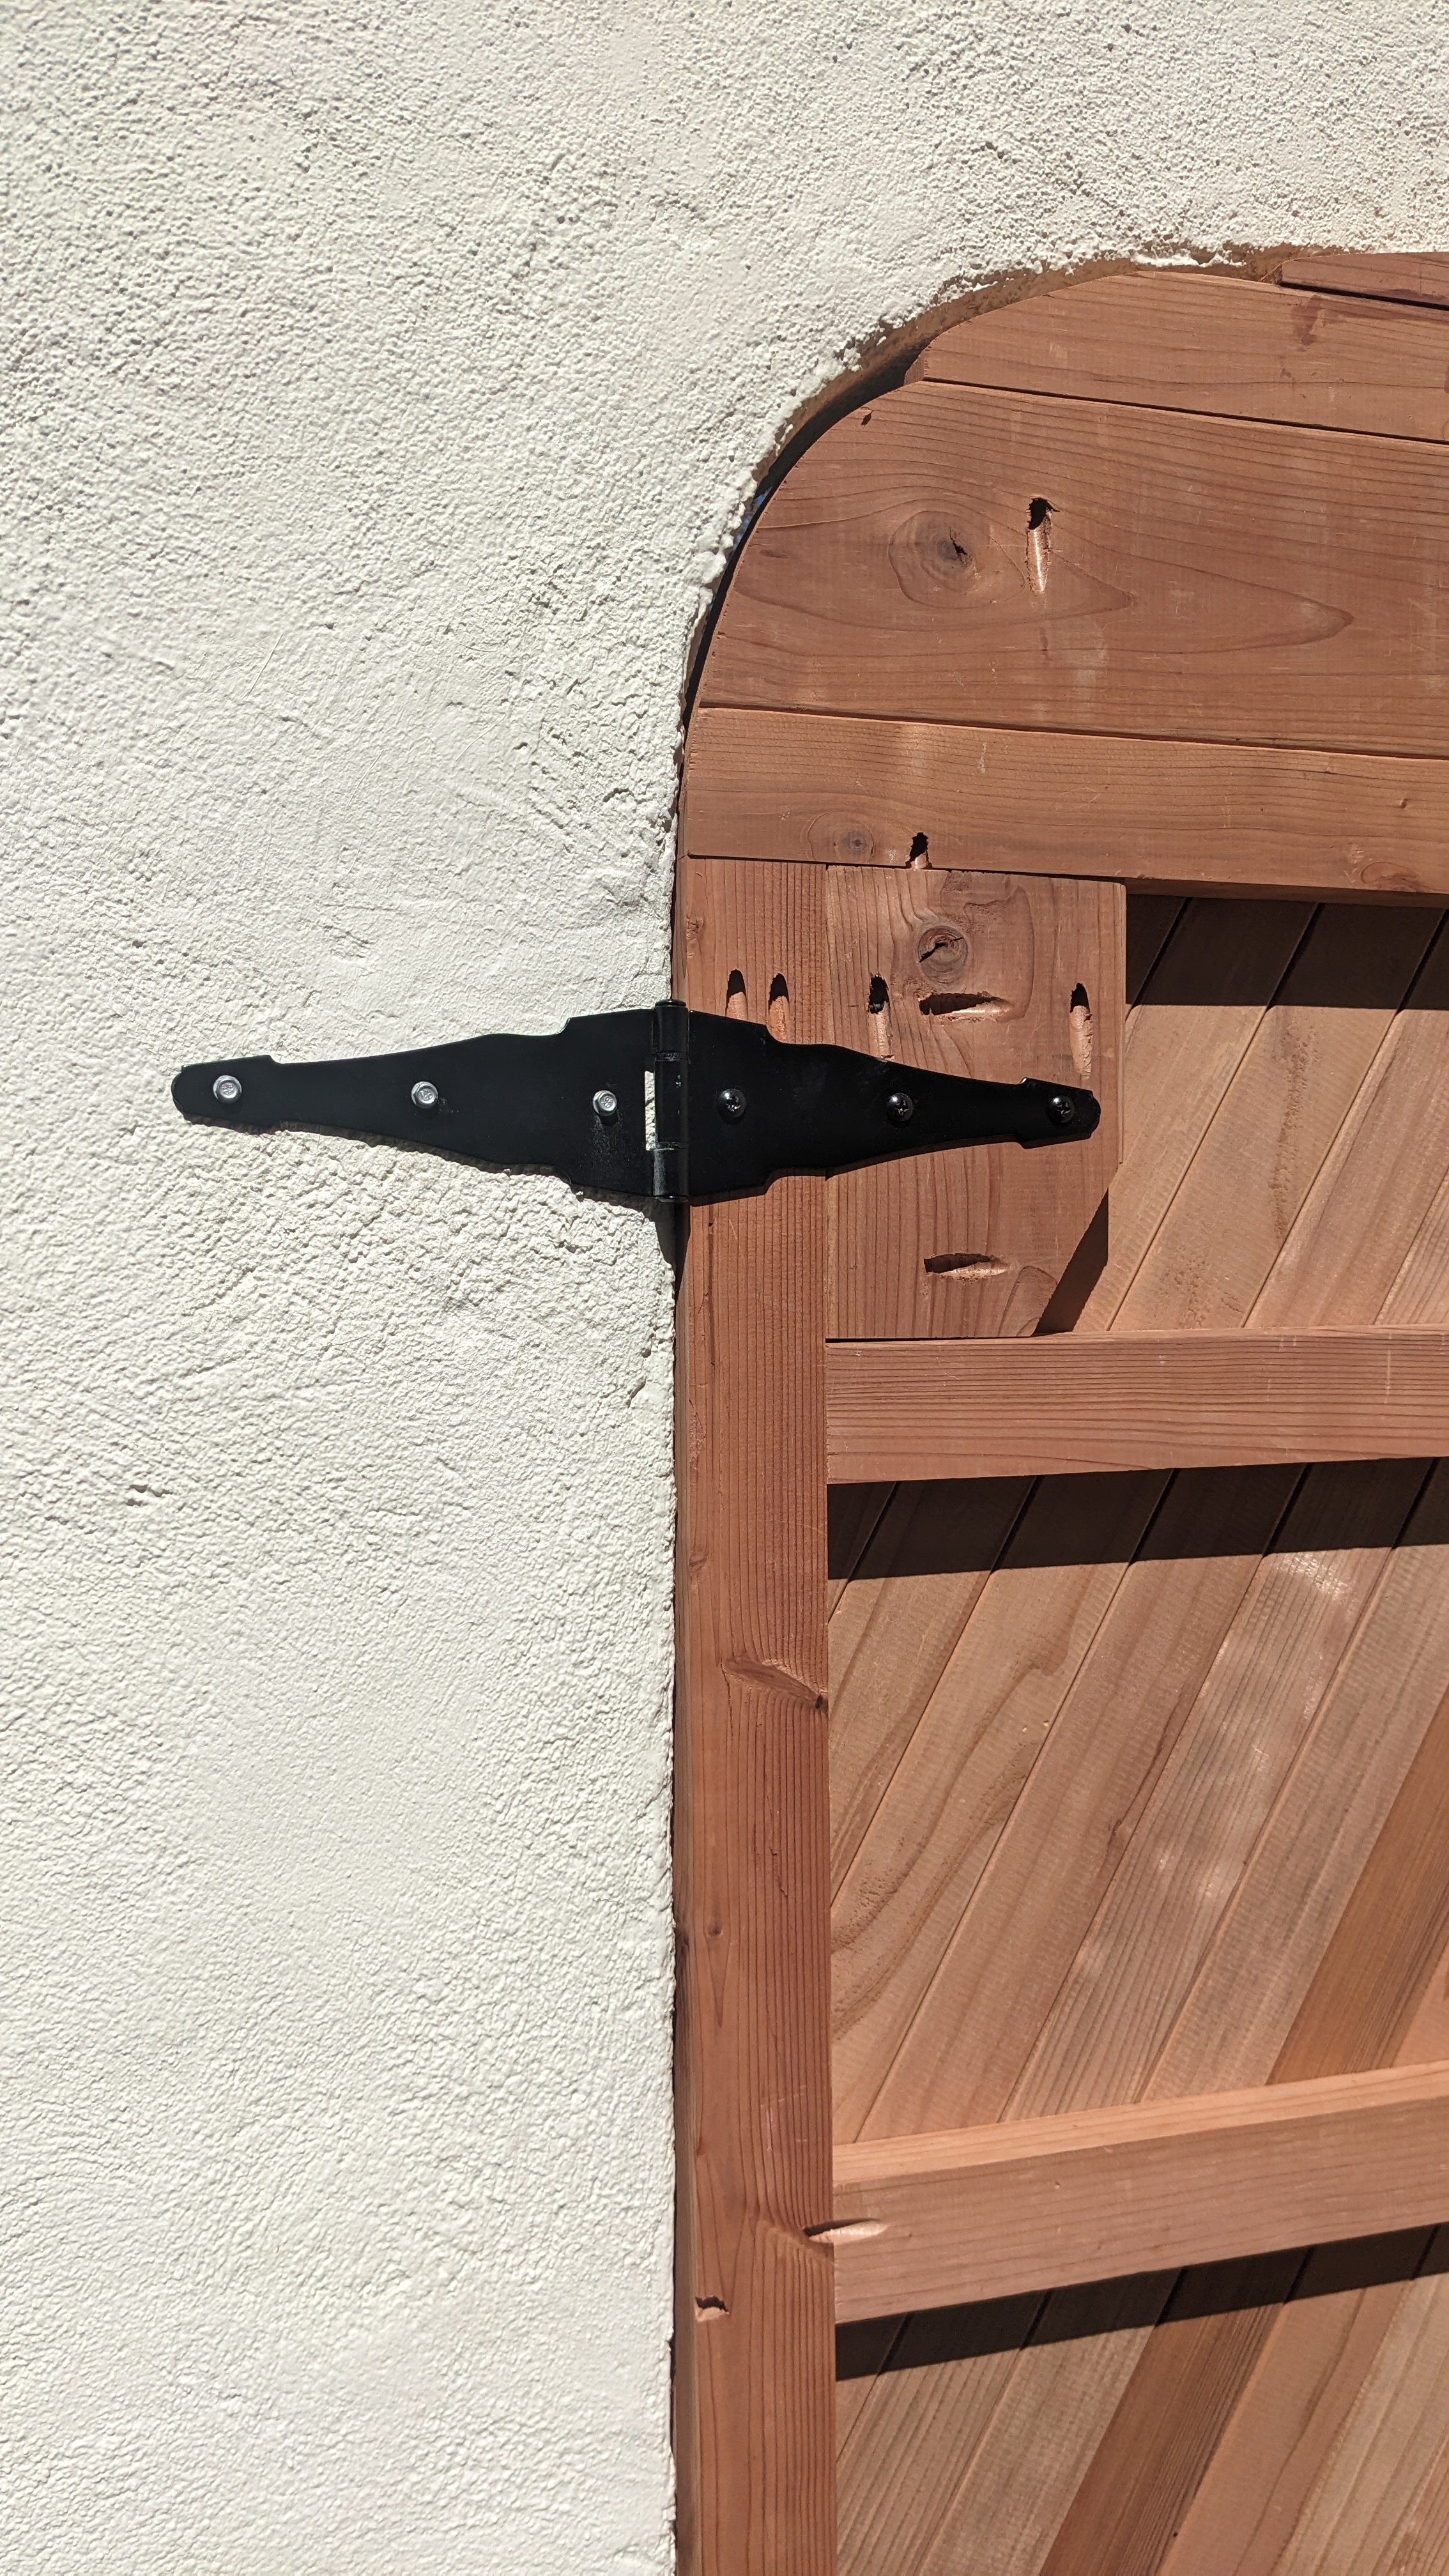
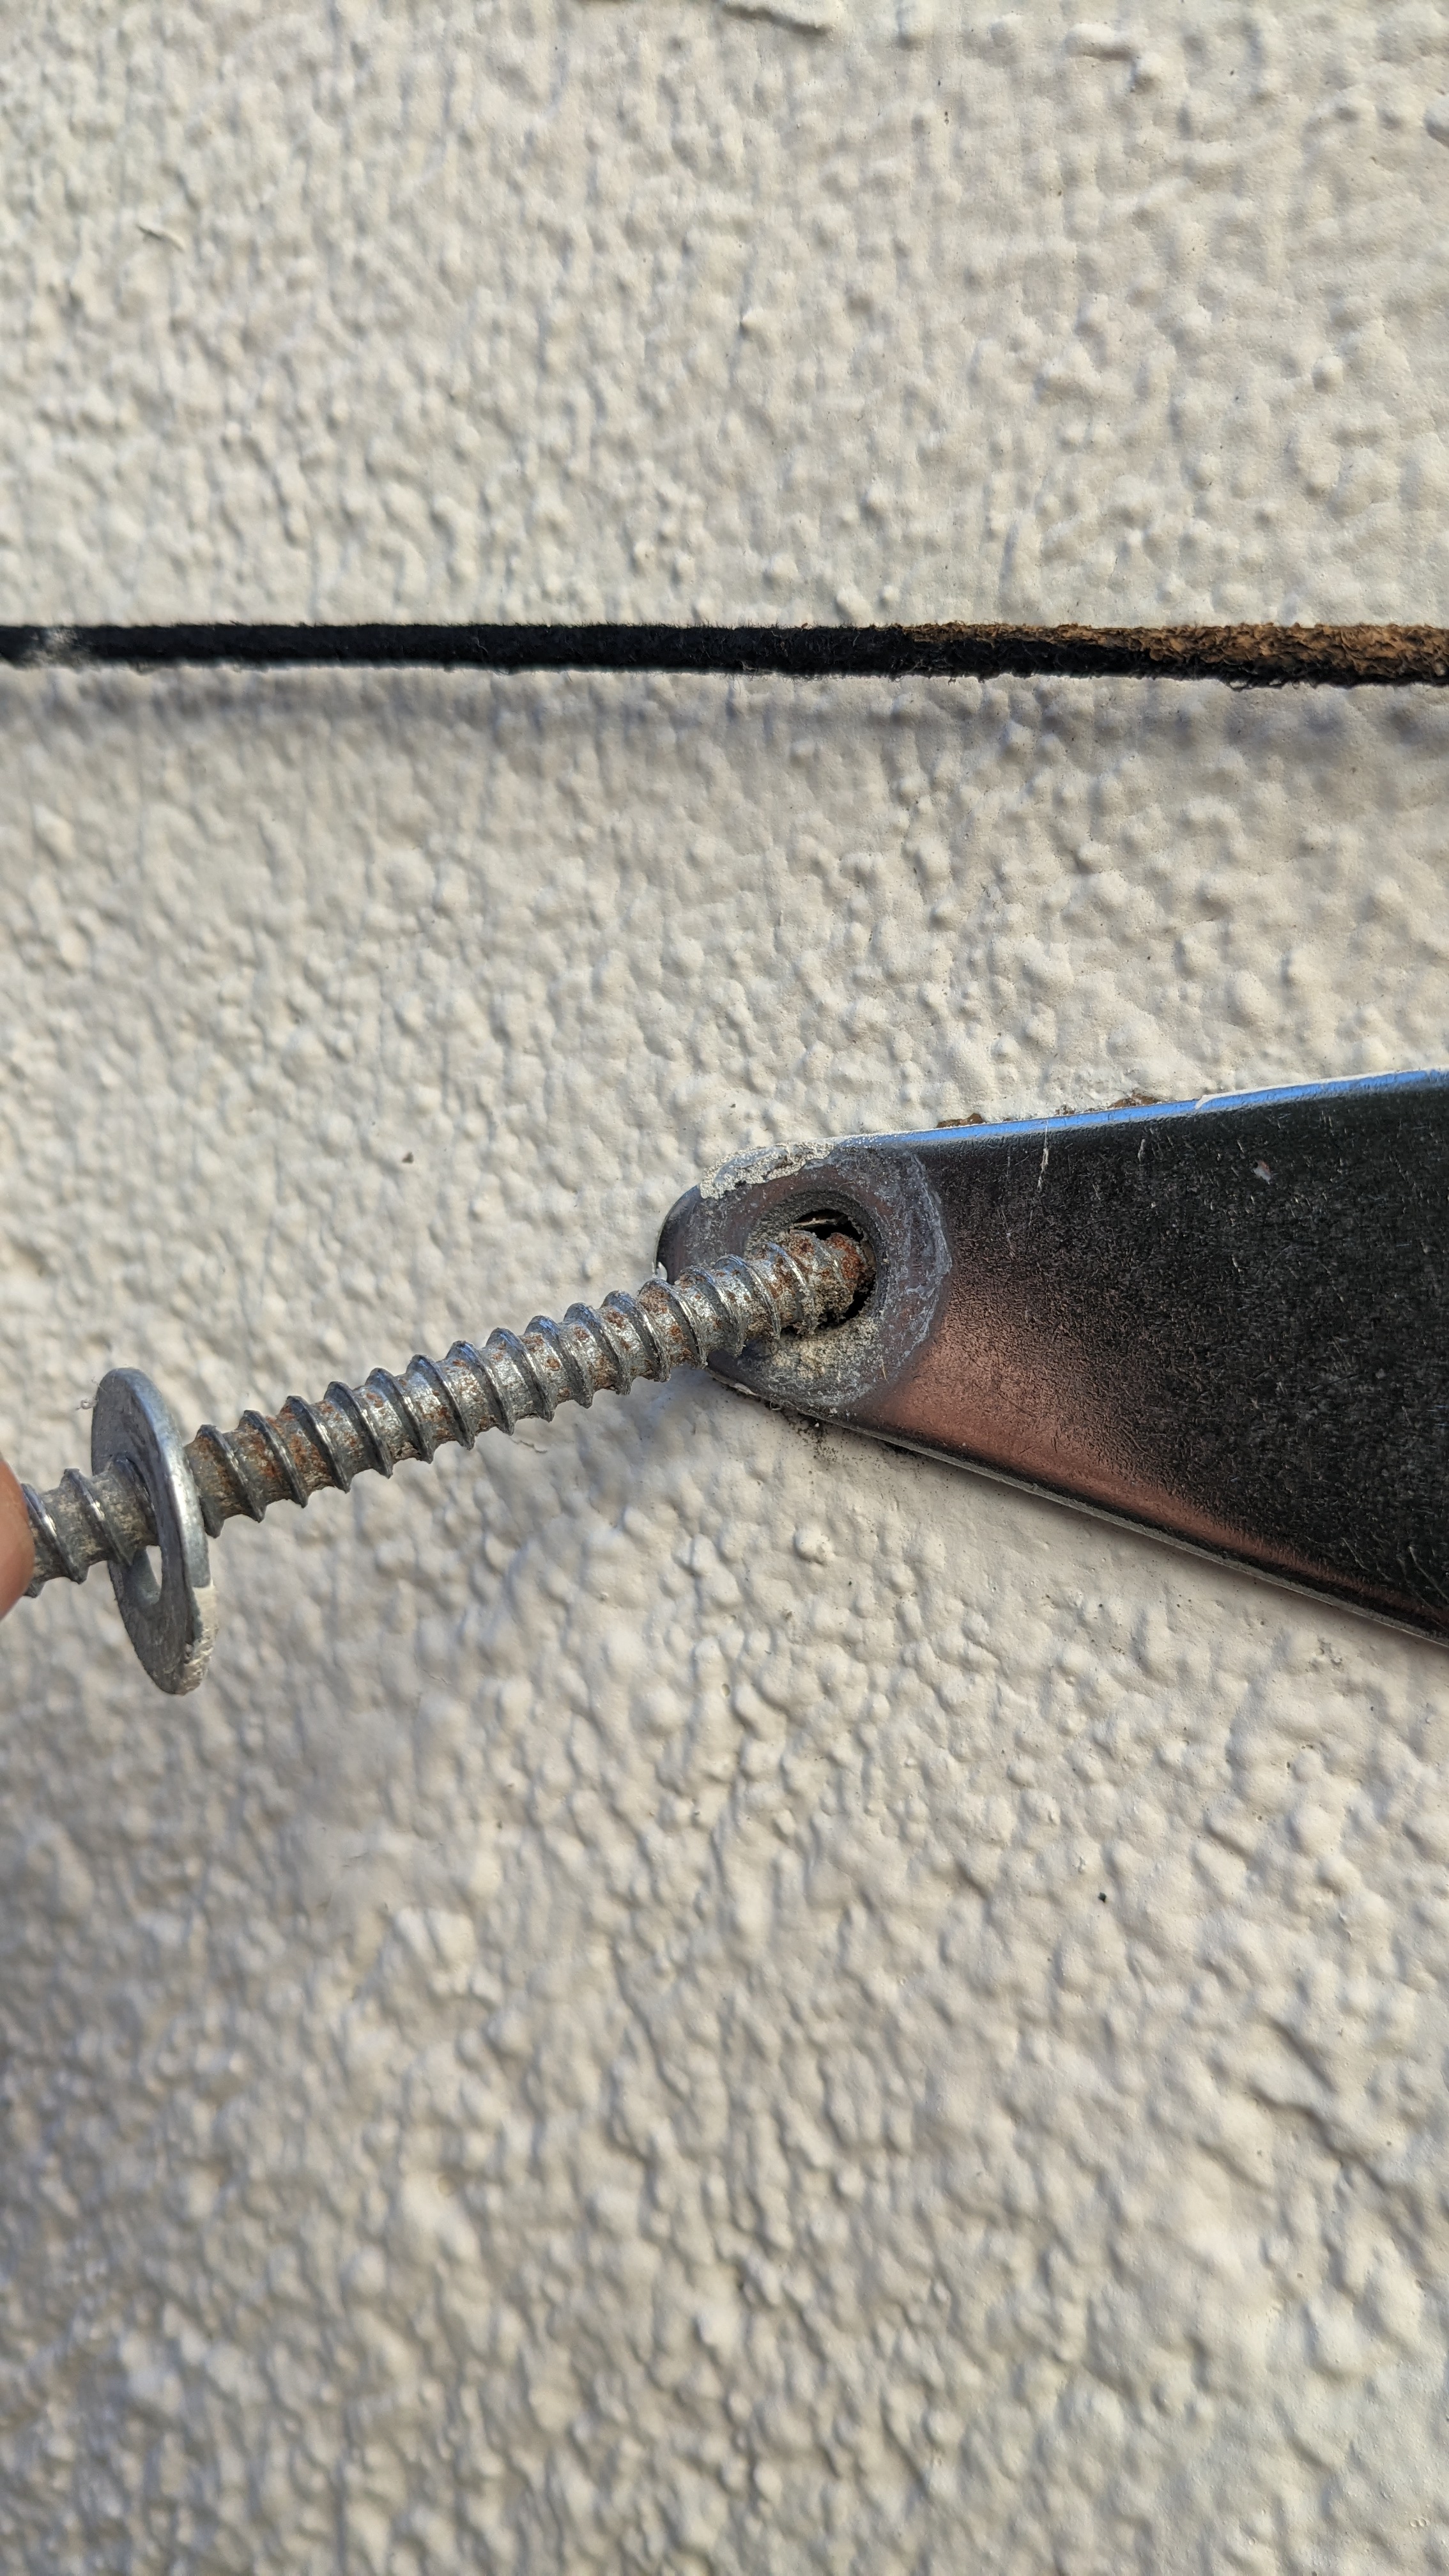
Hardware
Hinges are in -- I used stainless anchors designed for cinderblock/concrete.. although tbh the wall might just be studs and OSB, I'm really not sure anymore. Oh yeah I also had to patch up and paint the old hinge-spots. With the patch, to match the stucco, I tried to apply a similar texture with a paint roller, to limited effect. The handle and catch are installed. That same neighbor suggested I wait for things to settle a bit before I line up the latch, so that final piece will be added soon. Later I may also add a little window or some decorative Spanish-style banding to the outside.. feels like a few extra details could look really nice. I cut the ropes holding up the jasmine and wrapping around the arch..need to fix that too!